Case Study: How Unico's Platform Engineering Team Closed the DevOps/Databases Gap Using Atlas

"Month over month, we see smaller and smaller incidents.", Luiz Casali, Sr Engineering Manager
Company Background
Unico is a leading digital identity technology provider in Brazil, developing secure and efficient digital identity solutions for businesses and individuals. Their platform helps organizations streamline identity verification processes, delivering a seamless user experience while enhancing security and reducing fraud.
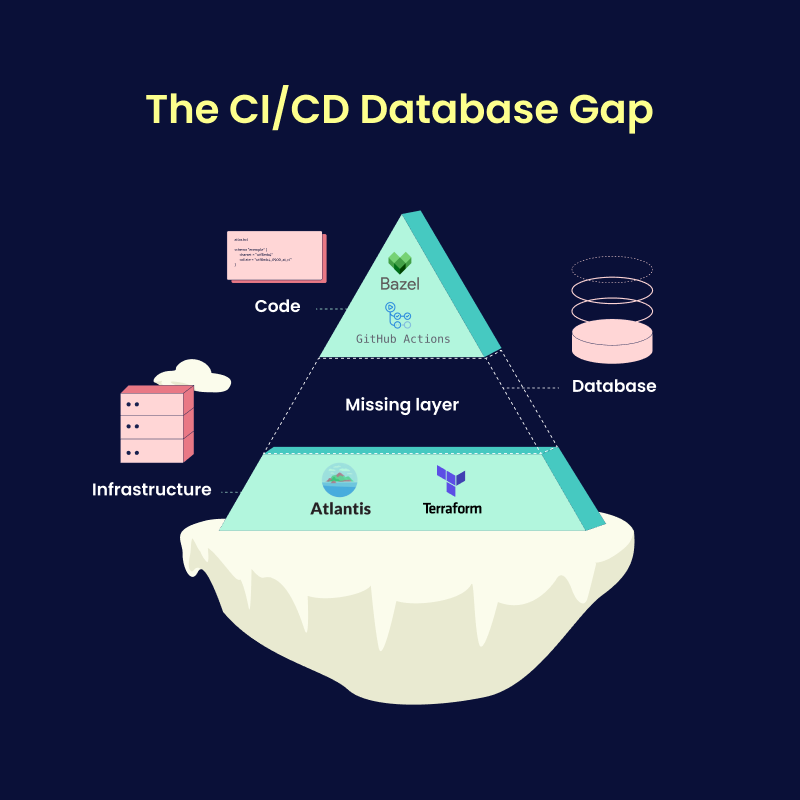
The Missing Layer: Tackling Complexity, Outages, and Risks in Database Schema Management
At Unico, the Platform Engineering team, led by Luiz Casali, is focused on improving developer productivity. "Reducing complexity for developers is one of our top priorities," Luiz explained.
Unico's Platform team had previously built solutions to automate CI/CD workflows for code using Bazel and GitHub Actions and for infrastructure using Terraform and Atlantis. The team was missing a standardized solution for managing database schema changes.
This gap introduced several pressing issues:
- Risky Manual Processes: Database schema changes (migrations) were performed manually, increasing the chance of human error.
- Unreliable Deployments: Unplanned, database-related outages were common, emphasizing the need for a safer way to handle database changes.
- Compliance Requirements: The team needed to document and review schema changes to maintain governance standards, but the lack of automation made this challenging.
Determined to bridge this gap and establish a safer, more efficient solution for developers, Unico's Platform Engineering team began researching the best database migration tools. Thiago da Silva Conceição, a Site Reliability Engineer (SRE) in the team, took the lead on this technical evaluation.