Announcing v0.19: Pre-migration Checks, Schema Docs, MSSQL Triggers, and more

Hi everyone,
We are excited to share our latest release with you! Here's what's new:
- Pre-migration Checks: Before migrating your schema, you can now add SQL checks that will be verified to help avoid risky migrations.
- Schema Docs: Atlas lets you manage your database schema as code. One of the things we love most about code, is that because of its formal structure, it's possible to automatically generate documentation from it. With this release, we're introducing a new feature that lets you generate code-grade documentation for your database schema.
- SQL Server Trigger Support: Atlas now supports managing triggers in SQL Server.
- ClickHouse Materialized View Support: Atlas now supports managing materialized views in ClickHouse.
Let's dive in.
Pre-migration Checks
Atlas now supports the concept of pre-migration checks, where each migration version can include a list of assertions (predicates) that must evaluate to true before the migration is applied.
For example, before dropping a table, we aim to ensure that no data is deleted and the table must be empty, or we check for the absence of duplicate values before adding a unique constraint to a table.
This is especially useful if we want to add our own specific logic to migration versions, and it helps to ensure that our database changes are safe.
Pre-migration checks work for Cloud connected directories. Check out the introduction guide to get started with Atlas Cloud.
To add these checks, Atlas supports a text-based file archive to describe "migration plans". Unlike regular migration files,
which mainly contain a list of DDL statements (with optional directives), Atlas txtar files (currently) support two file
types: migration files and pre-execution check files.
The code below presents a simple example of a pre-migration check. The default checks file is named checks.sql,
and the migration.sql file contains the actual DDLs to be executed on the database in case the assertions are passed.
-- atlas:txtar

-- checks.sql --
-- The assertion below must be evaluated to true. Hence, the "users" table must not contain any rows.
SELECT NOT EXISTS(SELECT * FROM users);

-- migration.sql --
-- The statement below will be executed only if the assertion above evaluates to true.
DROP TABLE users;
If the pre-execution checks pass, the migration will be applied, and Atlas will report the results.
atlas migrate --dir atlas://app --env prod
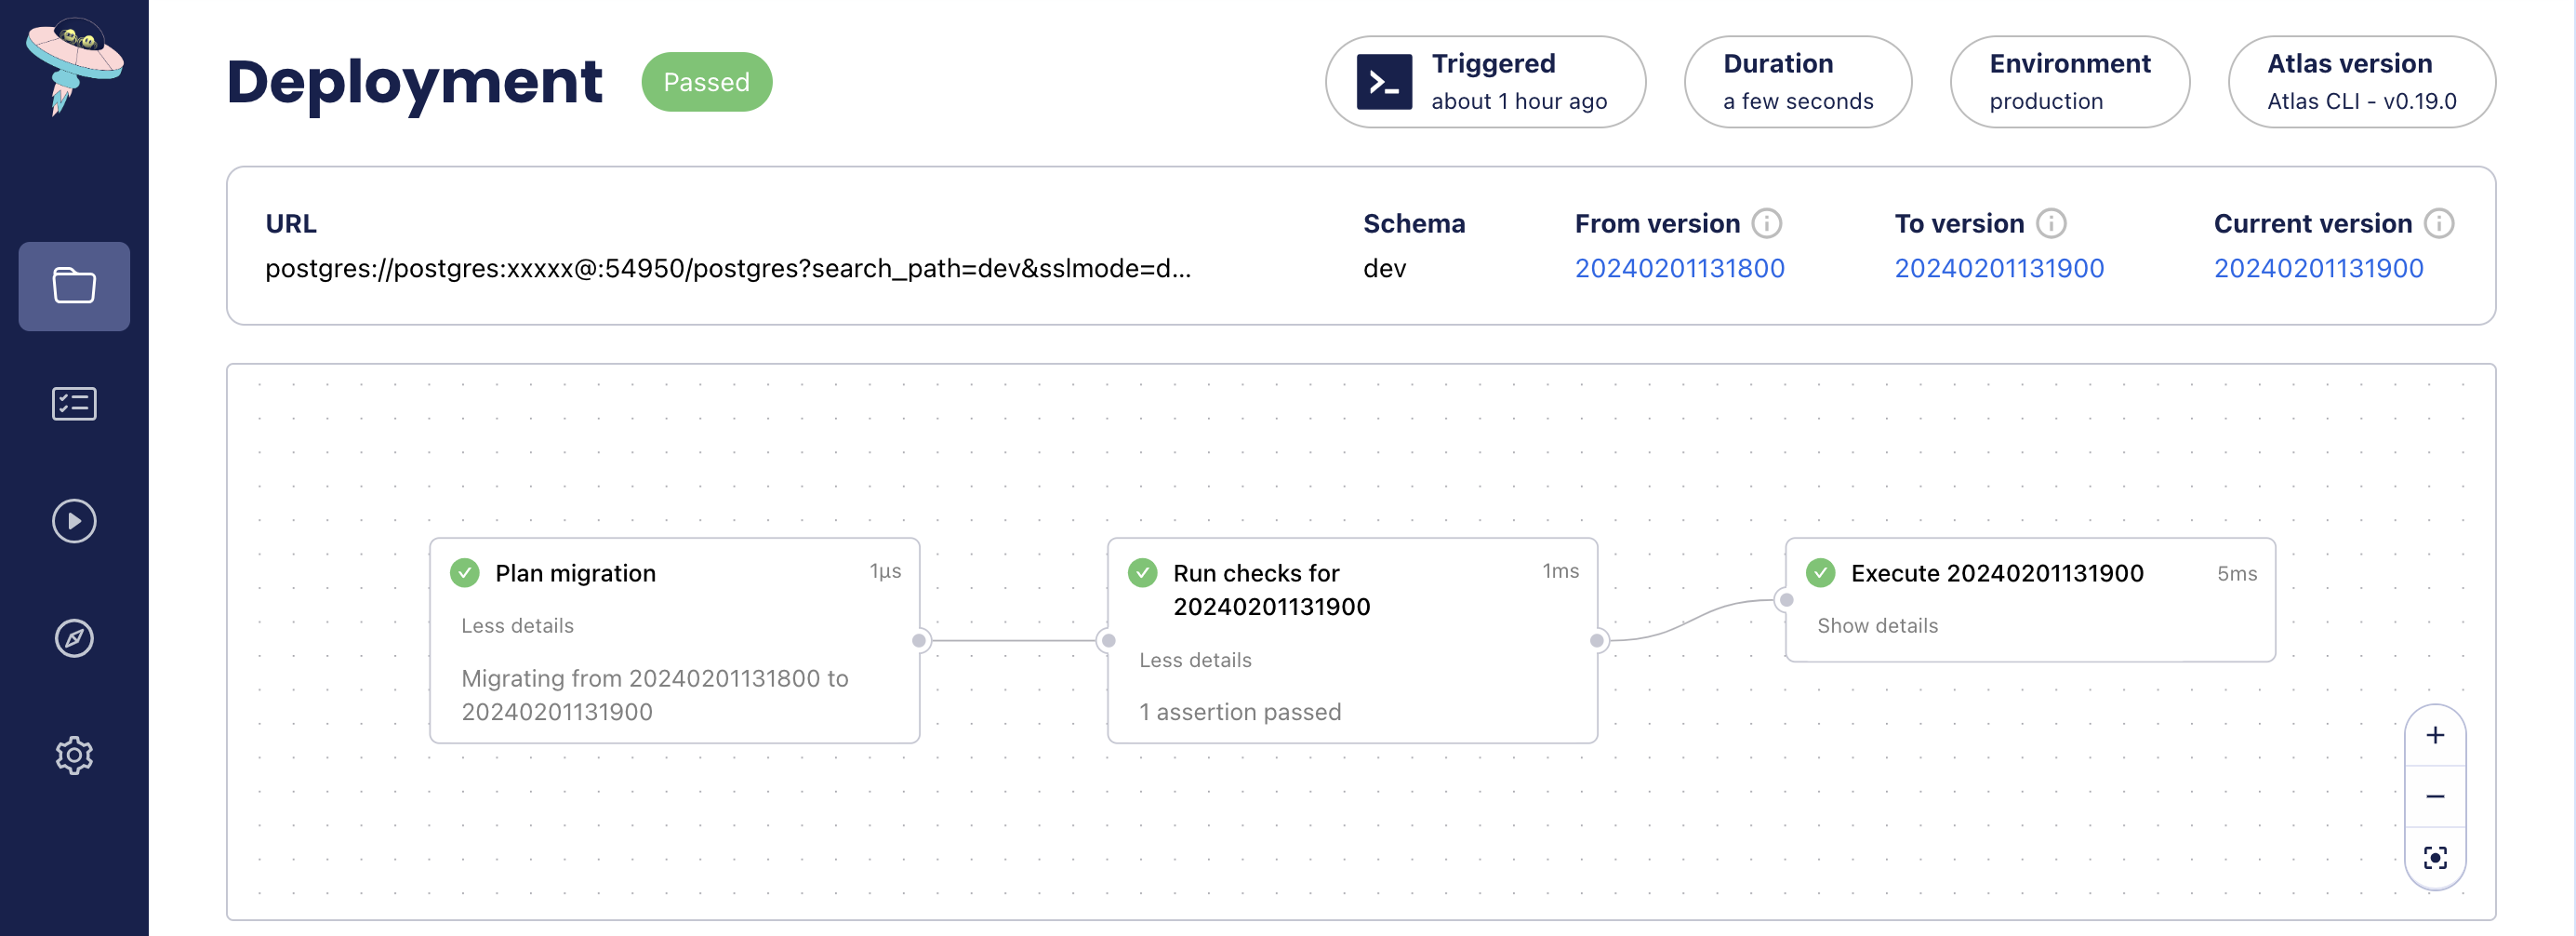
Migrating to version 20240201131900 from 20240201131800 (1 migrations in total):
  -- checks before migrating version 20240201131900
    -> SELECT NOT EXISTS(SELECT * FROM users);
  -- ok (624.004µs)
  -- migrating version 20240201131900
    -> DROP TABLE users;
  -- ok (5.412737ms)
  -------------------------
  -- 22.138088ms
  -- 1 migration
  -- 1 check
  -- 1 sql statement
If the pre-execution checks fail, the migration will not be applied, and Atlas will exit with an error.
atlas migrate --dir atlas://app --env prod
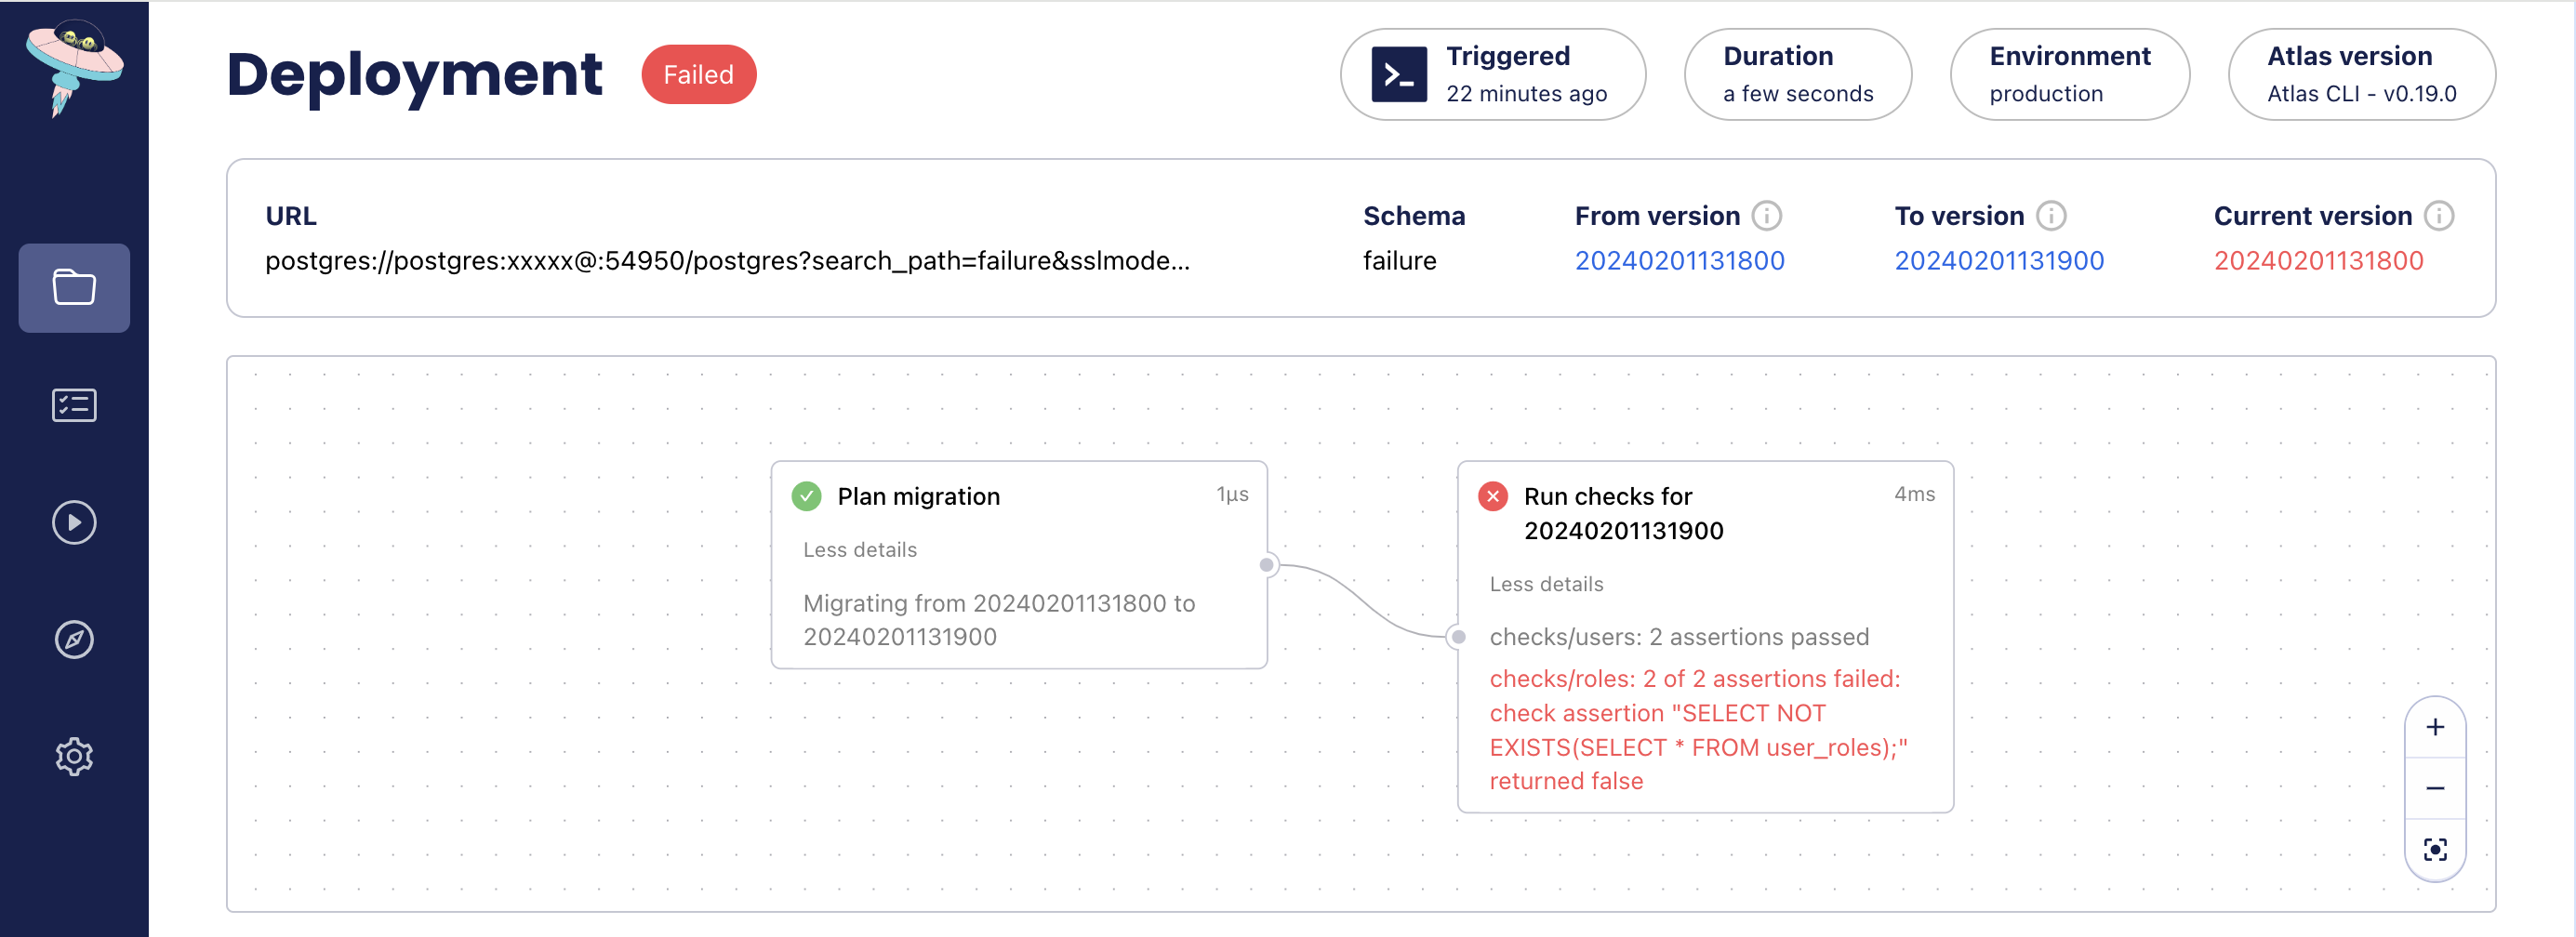
Migrating to version 20240201131900 from 20240201131800 (1 migrations in total):
  -- checks before migrating version 20240201131900
    -> SELECT NOT EXISTS(SELECT * FROM internal_users);
    -> SELECT NOT EXISTS(SELECT * FROM external_users);
  -- ok (1.322842ms)
  -- checks before migrating version 20240201131900
    -> SELECT NOT EXISTS(SELECT * FROM roles);
    -> SELECT NOT EXISTS(SELECT * FROM user_roles);
    2 of 2 assertions failed: check assertion "SELECT NOT EXISTS(SELECT * FROM user_roles);" returned false
  -------------------------
  -- 19.396779ms
  -- 1 migration with errors
  -- 2 checks ok, 2 failures
Error: 2 of 2 assertions failed: check assertion "SELECT NOT EXISTS(SELECT * FROM user_roles);" returned false
To learn more about how to use pre-migration checks, read the documentation here.
Schema Docs
One of the most surprising things we learned from working with teams on their Atlas journey, is that many teams do not have a single source of truth for their database schema. As a result, it's impossible to maintain up-to-date documentation for the database schema, which is crucial for disseminating knowledge about the database across the team.
Atlas changes this by creating a workflow that begins with a single source of truth for the database schema - the desired state of the database, as defined in code. This is what enables Atlas to automatically plan migrations, detect drift (as we'll see below), and now, generate documentation.
How it works
Documentation is currently generated for the most recent version of your schema for migration directories that are pushed to Atlas Cloud. To generate docs for your schema, follow these steps:
-
Make sure you have the most recent version of Atlas:
- macOS + Linux
- Homebrew
- Docker
- Windows
- CI
- Manual Installation
To download and install the latest release of the Atlas CLI, simply run the following in your terminal:
curl -sSf https://atlasgo.sh | shGet the latest release with Homebrew:
brew install ariga/tap/atlasTo pull the Atlas image and run it as a Docker container:
docker pull arigaio/atlas
docker run --rm arigaio/atlas --help
If the container needs access to the host network or a local directory, use the
--net=hostflag and mount the desired directory:docker run --rm --net=host \
-v $(pwd)/migrations:/migrations \
arigaio/atlas migrate apply \
--url "mysql://root:pass@:3306/test"Download the latest release and move the atlas binary to a file location on your system PATH.
GitHub Actions
Use the setup-atlas action to install Atlas in your GitHub Actions workflow:
- uses: ariga/setup-atlas@v0
  with:
    cloud-token: ${{ secrets.ATLAS_CLOUD_TOKEN }}
Other CI Platforms
For other CI/CD platforms, use the installation script. See the CI/CD integrations for more details.
-
Login to Atlas Cloud using the CLI:
atlas loginIf you do not already have a (free) Atlas Cloud account, follow the instructions to create one.
-
Push your migrations to Atlas Cloud:
atlas migrate push <dir name>Be sure to replace
<dir name>with the name of the directory containing your migrations. (e.gapp) -
Atlas will print a link to the overview page for your migration directory, e.g:
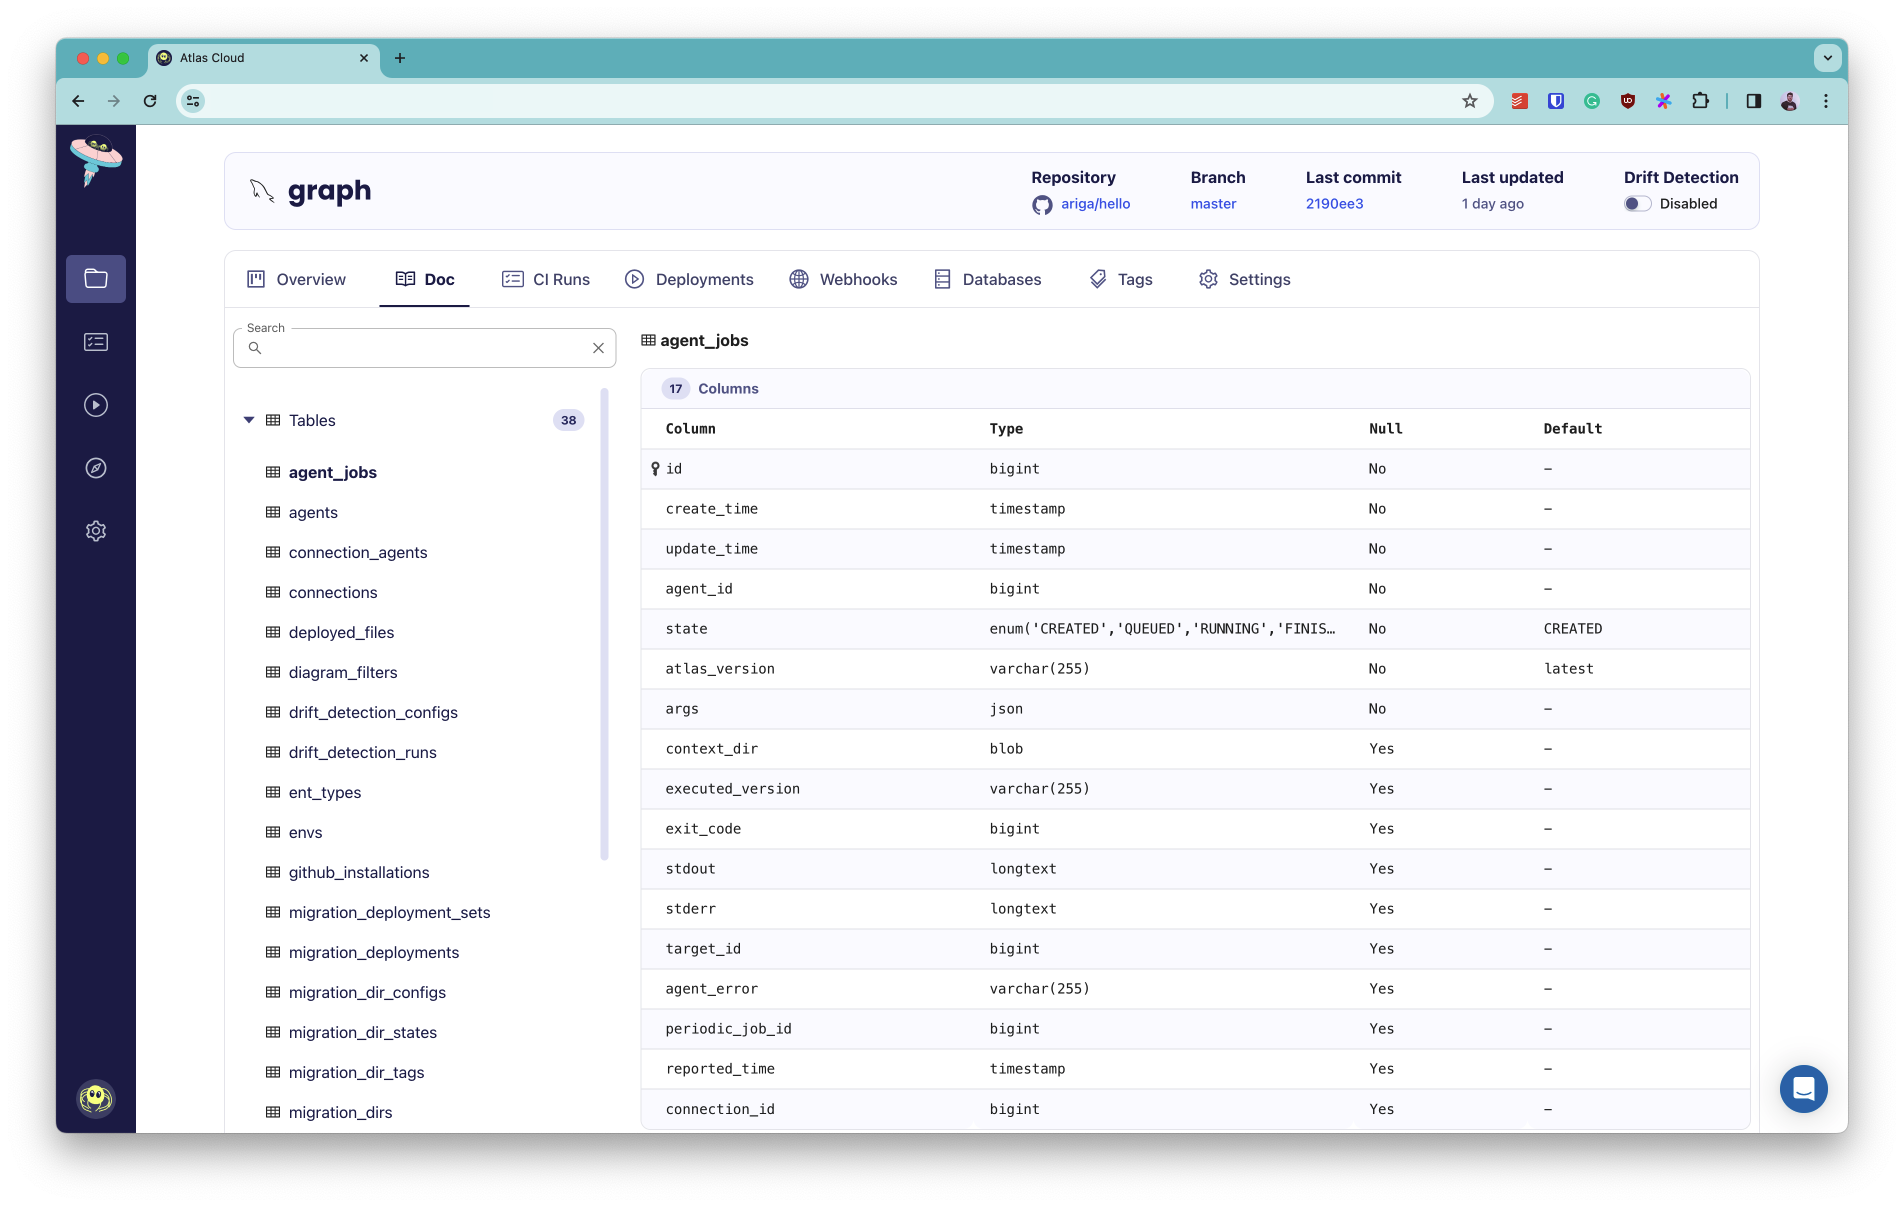
https://gh.atlasgo.cloud/dirs/4294967296 -
Click on "Doc" in the top tabs to view the documentation for your schema.
SQL Server Trigger Support
In version v0.17, we released trigger support for PostgreSQL, MySQL and SQLite. In this release, we have added support for SQL Server as well.
Triggers are a powerful feature of relational databases that allow you to run custom code when certain events occur on a table or a view. For example, you can use triggers to automatically update the amount of stock in your inventory when a new order is placed or to create an audit log of changes to a table. Using this event-based approach, you can implement complex business logic in your database, without having to write any additional code in your application.
Managing triggers as part of the software development lifecycle can be quite a challenge. Luckily, Atlas's database schema-as-code approach makes it easy to do!
Triggers are currently in beta and available to logged-in users only. To use this feature, run:
atlas login
Let's use Atlas to build a small chunk of a simple e-commerce application:
-
Download the latest version of the Atlas CLI:
- macOS + Linux
- Homebrew
- Docker
- Windows
- CI
- Manual Installation
To download and install the latest release of the Atlas CLI, simply run the following in your terminal:
curl -sSf https://atlasgo.sh | shGet the latest release with Homebrew:
brew install ariga/tap/atlasTo pull the Atlas image and run it as a Docker container:
docker pull arigaio/atlas
docker run --rm arigaio/atlas --help
If the container needs access to the host network or a local directory, use the
--net=hostflag and mount the desired directory:docker run --rm --net=host \
-v $(pwd)/migrations:/migrations \
arigaio/atlas migrate apply \
--url "mysql://root:pass@:3306/test"Download the latest release and move the atlas binary to a file location on your system PATH.
GitHub Actions
Use the setup-atlas action to install Atlas in your GitHub Actions workflow:
- uses: ariga/setup-atlas@v0
  with:
    cloud-token: ${{ secrets.ATLAS_CLOUD_TOKEN }}
Other CI Platforms
For other CI/CD platforms, use the installation script. See the CI/CD integrations for more details.
-
Make sure you are logged in to Atlas:
atlas login -
Let's spin up a new SQL Server database using
docker:docker run --rm -e 'ACCEPT_EULA=Y' -e 'MSSQL_SA_PASSWORD=P@ssw0rd0995' -p 1433:1433 --name atlas-demo -d mcr.microsoft.com/mssql/server:latest -
Next, let's define and apply the base table for our application:
schema "dbo" {
}
table "grades" {
  schema = schema.dbo
  column "student_id" {
    null = false
    type = bigint
  }
  column "course_id" {
    null = false
    type = bigint
  }
  column "grade" {
    null = false
    type = int
  }
  column "grade_status" {
    null = true
    type = varchar(10)
  }
  primary_key {
    columns = [column.student_id, column.course_id]
  }
}
The grades table represents a student's grade for a specific course. The column grade_status will remain null
at first, and we will use a trigger to update whether it the grade is pass or fail.
Apply this schema on our local SQL Server instance using the Atlas CLI:
atlas schema apply \
  --url "sqlserver://sa:P@ssw0rd0995@localhost:1433?database=master" \
  --to "file://schema.hcl" \
  --dev-url "docker://sqlserver/2022-latest/dev?mode=schema" \
  --auto-approve
This command will apply the schema defined in schema.hcl to the local SQL Server instance.
Notice the --auto-approve flag, which instructs Atlas to automatically apply the schema
without prompting for confirmation.
- Now, let's define the logic to assign a
grade_statususing aTRIGGER. Append this definition toschema.hcl:
  trigger "after_grade_insert" {
    on = table.grades
    after {
      insert = true
    }
    as = <<-SQL
     BEGIN
       SET NOCOUNT ON;

      UPDATE grades
      SET grade_status = CASE
          WHEN inserted.grade >= 70 THEN 'Pass'
          ELSE 'Fail'
          END
          FROM grades
      INNER JOIN inserted ON grades.student_id = inserted.student_id and grades.course_id = inserted.course_id;
      END
    SQL
  }
We defined a TRIGGER called after_grade_insert. This trigger is
executed after new rows are inserted or existing rows are updated into the grades table. The trigger
executes the SQL statement, which updates the grade_status column to either 'Pass' or 'Fail' based on the grade.
Apply the updated schema using the Atlas CLI:
atlas schema apply \
  --url "sqlserver://sa:P@ssw0rd0995@localhost:1433?database=master" \
  --to "file://schema.hcl" \
  --dev-url "docker://sqlserver/2022-latest/dev?mode=schema" \
  --auto-approve
Notice that Atlas automatically detects that we have added a new TRIGGER, and applies it to the database.
-
Finally, let's test our application to see that it actually works. We can do this by populating our database with some students' grades. To do so, connect to the SQL Server container and open a
sqlcmdsession.docker exec -it atlas-demo /opt/mssql-tools/bin/sqlcmd -S localhost -U SA -P 'P@ssw0rd0995'Now that a
sqlcmdsession is open, we can populate the items:INSERT INTO grades (student_id, course_id, grade, grade_status) VALUES (1, 1, 87, null);
INSERT INTO grades (student_id, course_id, grade, grade_status) VALUES (1, 2, 99, null);
INSERT INTO grades (student_id, course_id, grade, grade_status) VALUES (2, 2, 68, null);To exit the session write
Quit.Now, let's check the
gradestable to see that thegrade_statuscolumn was updated correctly:docker exec -it atlas-demo /opt/mssql-tools/bin/sqlcmd -S localhost -U SA -P 'P@ssw0rd0995' -Q "SELECT * FROM grades;"You should see the following output:
 student_id    course_id        grade   grade_status
 ---------- ------------- ----------- --------------
          1             1          87 Pass
          1             2          99 Pass
          2             2          68 Fail
 (3 rows affected)
Amazing! Our trigger automatically updated the
grade_statusfor each of the rows.
ClickHouse Materialized View Support
A materialized view is a table-like structure that holds the results of a query. Unlike a regular view, the results of
a materialized view are stored in the database and can be refreshed periodically to reflect changes in the underlying data.
Materialized views are currently available to logged-in users only. To use this feature, run:
atlas login
Let's see an example of how to write a materialized view in HCL for a ClickHouse database:
materialized "mat_view" {
  schema     = schema.public
  to         = table.dest
  as         = "SELECT * FROM table.src"
  depends_on = [table.src]
}
In the example above, when creating materialized views with TO [db.]table, the view will be created with the same structure as the table
or view specified in the TO clause.
The engine and primary_key attributes are required if the TO clause is not specified.
In this syntax, populate can be used for the first time to populate the materialized view:
materialized "mat_view" {
  schema = schema.public
  engine = MergeTree
  column "id" {
    type = UInt32
  }
  column "name" {
    type = String
  }
  primary_key {
    columns = [column.id]
  }
  as         = "SELECT * FROM table.src"
  populate   = true
  depends_on = [table.src]
}
Note that modifying the materialized view structure after the initial creation is not supported by Atlas currently.
Wrapping up
That's it! I hope you try out (and enjoy) all of these new features and find them useful. As always, we would love to hear your feedback and suggestions on our Discord server.