4 posts tagged with "terraform"

View All Tags

ยท 8 min read
Rotem Tamir
TL;DR

You can now use the Atlas Kubernetes Operator to safely manage your database schemas with Atlas from within your Kubernetes cluster.

See an example

Introductionโ€‹

Today, we are excited to announce the release of Atlas v0.11.0, which introduces the Atlas Kubernetes Operator. This release is a major milestone in our mission to make Atlas the most robust and modern way to manage your database schemas. With the Atlas Kubernetes Operator, you can now manage your database schemas with Atlas from within your Kubernetes cluster.

In this release, we also introduce a new concept to Atlas - "Diff Policies" - which allow you to customize the way Atlas plans database migrations for you. This concept is directly related to the Kubernetes Operator, and we will explain how below.

What are Kubernetes Operators?โ€‹

Kubernetes has taken the cloud infrastructure world by storm mostly thanks to its declarative API. When working with Kubernetes, developers provide their cluster's desired configuration to the Kubernetes API, and Kubernetes is responsible for reconciling the actual state of the cluster with the desired state. This allows developers to focus on the desired state of their cluster, and let Kubernetes handle the complexities of how to get there.

This works out incredibly well for stateless components, such as containers, network configuration and access policies. The benefit of stateless components is that they can be replaced at any time, and Kubernetes can simply create a new instance of the component with the desired configuration. For stateful resources, such as databases, this is not the case. Throwing away a running database and creating a new one with the desired configuration is not an option.

For this reason, reconciling the desired state of a database with its actual state can be a complex task that requires a lot of domain knowledge. Kubernetes Operators were introduced to the Kubernetes ecosystem to help users manage complex stateful resources by codifying this type of domain knowledge into a Kubernetes controller.

What is the Atlas Kubernetes Operator?โ€‹

The Atlas Kubernetes Operator is a Kubernetes controller that uses Atlas to manage your database schema. The Atlas Kubernetes Operator allows you to define the desired schema and apply it to your database using the Kubernetes API.

Declarative schema migrationsโ€‹

The Atlas Kubernetes Operator supports declarative migrations. In declarative migrations, the desired state of the database is defined by the user and the operator is responsible for reconciling the desired state with the actual state of the database (planning and executing CREATE, ALTER and DROP statements).

Diffing policiesโ€‹

One of the common objections to applying declarative workflows to databases is that there are often multiple ways to achieve the same desired state. For example, if you are running a Postgres database, you may want to add an index to a table. Depending on your circumstances, you may want to add this index with or without the CONCURRENTLY option. When using a declarative workflow, you supply where you want to go, but not how to get there.

To address this concern, we have introduced the concept of "diff policies" to Atlas. Diff policies allow you to customize the way Atlas plans database schema changes for you. For example, you can define a diff policy that will always add the CONCURRENTLY option to CREATE INDEX statements. You can also define a diff policy that will skip certain kinds of changes (for example DROP COLUMN) altogether.

Diff policies can be defined in the atlas.hcl file you use to configure Atlas. For example:

env "local" {
diff {
// By default, indexes are not created or dropped concurrently.
concurrent_index {
create = true
drop = true
}
}
}

Diff policies are especially valuable when using the Atlas Kubernetes Operator, as they allow you to customize and constrain the way the operator manages your database to account for your specific needs. We will see an example of this below.

Demo time!โ€‹

Let's see the Atlas Kubernetes Operator in action. In this demo, we will use the Atlas Kubernetes Operator to manage a MySQL database running in a Kubernetes cluster.

The Atlas Kubernetes Operator is available as a Helm Chart. To install the chart with the release name atlas-operator:

helm install atlas-operator oci://ghcr.io/ariga/charts/atlas-operator

After installing the operator, follow these steps to get started:

  1. Create a MySQL database and a secret with an Atlas URL to the database:

    kubectl apply -f https://raw.githubusercontent.com/ariga/atlas-operator/master/config/integration/mysql.yaml

    Result:

    deployment.apps/mysql created
    service/mysql created
    secret/mysql-credentials created
  2. Create a file named schema.yaml containing an AtlasSchema resource to define the desired schema:

    apiVersion: db.atlasgo.io/v1alpha1
    kind: AtlasSchema
    metadata:
    name: atlasschema-mysql
    spec:
    urlFrom:
    secretKeyRef:
    key: url
    name: mysql-credentials
    schema:
    sql: |
    create table users (
    id int not null auto_increment,
    name varchar(255) not null,
    email varchar(255) unique not null,
    short_bio varchar(255) not null,
    primary key (id)
    );
  3. Apply the schema:

    kubectl apply -f schema.yaml

    Result:

    atlasschema.db.atlasgo.io/atlasschema-mysql created
  4. Check that our table was created:

    kubectl exec -it $(kubectl get pods -l app=mysql -o jsonpath='{.items[0].metadata.name}') -- mysql -uroot -ppass -e "describe myapp.users"

    Result:

    +-----------+--------------+------+-----+---------+----------------+
    | Field | Type | Null | Key | Default | Extra |
    +-----------+--------------+------+-----+---------+----------------+
    | id | int | NO | PRI | NULL | auto_increment |
    | name | varchar(255) | NO | | NULL | |
    | email | varchar(255) | NO | UNI | NULL | |
    | short_bio | varchar(255) | NO | | NULL | |
    +-----------+--------------+------+-----+---------+----------------+

    Hooray! We applied our desired schema to our target database.

Diff policies in actionโ€‹

Now let's see how we can use diffing policies to customize the way the operator manages our database. In this example, we will demonstrate how we can prevent the operator from dropping columns in our database. Modify the schema.yaml file:

apiVersion: db.atlasgo.io/v1alpha1
kind: AtlasSchema
metadata:
name: atlasschema-mysql
spec:
urlFrom:
secretKeyRef:
key: url
name: mysql-credentials
+ policy:
+ diff:
+ skip:
+ drop_column: true
schema:
sql: |
create table users (
id int not null auto_increment,
name varchar(255) not null,
email varchar(255) unique not null,
- short_bio varchar(255) not null,
primary key (id)
);

In the example above we added a policy section to our AtlasSchema resource. In this section, we defined a diff policy that will skip DROP COLUMN statements. In addition, we dropped the short_bio column from our schema. Let's apply the updated schema:

kubectl apply -f schema.yaml

Next, wait for the operator to reconcile the desired state with the actual state of the database:

kubectl wait --for=condition=Ready atlasschema/atlasschema-mysql

Finally, let's check that the short_bio column was not dropped. Run:

kubectl exec -it $(kubectl get pods -l app=mysql -o jsonpath='{.items[0].metadata.name}') -- mysql -uroot -ppass -e "describe myapp.users"

Result:

+-----------+--------------+------+-----+---------+----------------+
| Field | Type | Null | Key | Default | Extra |
+-----------+--------------+------+-----+---------+----------------+
| id | int | NO | PRI | NULL | auto_increment |
| name | varchar(255) | NO | | NULL | |
| email | varchar(255) | NO | UNI | NULL | |
| short_bio | varchar(255) | NO | | NULL | |
+-----------+--------------+------+-----+---------+----------------+

As you can see, the short_bio column was not dropped. This is because we defined a diffing policy that skips DROP COLUMN statements.

Linting policiesโ€‹

An alternative way to prevent the operator from dropping columns is to use a linting policy. Linting policies allow you to define rules that will be used to validate the changes to the schema before they are applied to the database. Let's see how we can define a policy that prevents the operator from applying destructive changes to the schema. Edit the schema.yaml file:

```diff
apiVersion: db.atlasgo.io/v1alpha1
kind: AtlasSchema
metadata:
name: atlasschema-mysql
spec:
urlFrom:
secretKeyRef:
key: url
name: mysql-credentials
policy:
+ lint:
+ destructive:
+ error: true
- diff:
- skip:
- drop_column: true
schema:
sql: |
create table users (
id int not null auto_increment,
name varchar(255) not null,
email varchar(255) unique not null,
primary key (id)
);

In the example above we replaced the diff policy with a lint policy. In this policy, we defined a destructive rule that will cause the operator to fail if it detects a destructive change to the schema. Notice that the short_bio is not present in the schema (we did this in our previous change).

Let's apply the updated schema:

kubectl apply -f schema.yaml

Next, let's wait for the operator to reconcile the desired state with the actual state of the database:

kubectl wait --for=condition=Ready atlasschema/atlasschema-mysql --timeout 10s

Notice that this time, the operator failed to reconcile the desired state with the actual state of the database:

error: timed out waiting for the condition on atlasschemas/atlasschema-mysql

Let's check the reason for this failure:

kubectl get atlasschema atlasschema-mysql -o jsonpath='{.status.conditions[?(@.type=="Ready")].message}'

Result:

destructive changes detected:
- Dropping non-virtual column "short_bio"

Hooray! We have successfully prevented the operator from applying destructive changes to our database.

Conclusionโ€‹

In this post, we have presented the Atlas Operator and demonstrated how you can use it to manage your database schema. We also covered diffing and linting policies and showed how you can use them to customize the way the operator manages your database.

How can we make Atlas better?โ€‹

We would love to hear from you on our Discord server โค๏ธ.

ยท 9 min read
Rotem Tamir
TL;DR

You can now use plain SQL to define the desired state of your database schema.

See an example

Earlier today, we released v0.5.0 of the Atlas Terraform Provider. This release includes two changes that, in my opinion, are a great improvement to the experience of working with the Atlas Provider.

In this post, I will discuss these two changes and how they can help you to manage your database schemas with Terraform:

  • Support for the docker:// driver for dev-databases.
  • Support for defining the desired state of your database schema in plain SQL (and any other schema loader supported by Atlas).

Improving the dev-database experience with the docker:// driverโ€‹

Atlas relies on a connection to an empty database which it can use to perform various calculations and operations. This database is called the "dev-database", and it allows Atlas to do things like validate the correctness of user-provided code as well as normalize user-input to the way the database actually sees it.

In previous versions of the Atlas Provider, the dev-database needed to be provided by the user. This was a bit cumbersome, as the user needed to spin up a database (usually by running a local Docker container), and then provide the connection string to it in the dev_url field of the atlas_schema resource.

To improve this experience, we added support for the docker:// driver, which allows the user to only provide the database engine and version, and Atlas will spin up an ephemeral container with the correct database engine and version. In addition, starting this version, users may define the dev_url on the provider scope. For example:

provider "atlas" {
dev_url = "docker://mysql/8/myapp"
}

Defining the desired state of the database schema in plain SQLโ€‹

In earlier versions of the Atlas Provider, the atlas_schema resource required the user to provide an Atlas HCL file which describes the desired state of the database schema. Many users found this syntax, which resembles Terraform's own, to be clean and concise. However, others disliked it and asked for a way to define the desired state in plain SQL.

To support this use-case, and many others, we have announced support for "schema loaders" - components that can be used to load the desired schema from many kinds of sources (such as plain SQL, an existing database, or the data-model of an ORM). To use this capability, users may use the atlas_schema data source, which accepts a url field that points to the desired schema. The scheme of this URL determines which schema loader will be used, for instance:

  • file://schema.sql - loads the schema from a local SQL file.
  • mysql://root:pass@localhost:3306/myapp - loads the schema from an existing MySQL database.
  • ent://service/ent/schema - loads the schema from the schema of an Ent project.

Managing database schemas in plain SQL using Terraformโ€‹

info

You can find the final code for this example here.

In the following example, we will show how you can use Terraform and the Atlas provider to manage a MySQL database schema in plain SQL.

Let's start by creating a Terraform file named main.tf installing the Atlas Terraform provider:

terraform {
required_providers {
atlas = {
source = "ariga/atlas"
version = "0.5.0"
}
}
}

In addition to installing the Atlas provider, we will also spin up a local MySQL database using Docker which will represent our target database that we will manage with Terraform. In a real-world scenario, you would probably use a managed database service such as AWS RDS or Google Cloud SQL, but for the purpose of brevity, a local database will suffice. Run:

docker run -d --name mysql -p 3306:3306 -e MYSQL_ROOT_PASSWORD=pass -e MYSQL_DATABASE=myapp mysql:8

Now that we have a database to manage, we can define the desired state of the database schema. Add a file named "schema.sql" with the following content:

create table users (
id int not null auto_increment primary key,
name varchar(255) not null
);

Next, we will define an atlas_schema data source that will load the schema from the schema.sql file:

data "atlas_schema" "sql" {
src = "file://${path.module}/schema.sql"
}

Finally, we will define an atlas_schema resource that will manage the schema in the target database. In addition, we will configure the Atlas provider to use the docker:// driver to spin up a temporary database container:

provider "atlas" {
dev_url = "docker://mysql/8/myapp"
}

resource "atlas_schema" "mysql" {
url = "mysql://root:pass@localhost:3306/myapp"
hcl = data.atlas_schema.sql.hcl
}

Now that we have defined our Terraform configuration, we can run terraform init to install the required providers:

terraform init

This should output something like:

Initializing provider plugins...
- Finding ariga/atlas versions matching "0.4.7"...
- Installing ariga/atlas v0.5.0...
- Installed ariga/atlas v0.5.0 (signed by a HashiCorp partner, key ID 45441FCEAAC3770C)

# ...

Terraform has been successfully initialized!

Finally, we can run terraform apply to create the database schema:

terraform apply

Terraform will print the following plan:

data.atlas_schema.sql: Reading...
data.atlas_schema.sql: Read complete after 4s [id=qnUvTyupgQzivof5LYWDOQ]

Terraform used the selected providers to generate the following execution plan. Resource actions are indicated with the following
symbols:
+ create

Terraform will perform the following actions:

# atlas_schema.myapp will be created
+ resource "atlas_schema" "myapp" {
+ hcl = <<-EOT
table "hello" {
schema = schema.myapp
column "world" {
null = true
type = text
}
column "thoughts" {
null = true
type = varchar(100)
}
}
schema "myapp" {
charset = "utf8mb4"
collate = "utf8mb4_0900_ai_ci"
}
EOT
+ id = (known after apply)
+ url = (sensitive value)
}

Plan: 1 to add, 0 to change, 0 to destroy.
โ•ท
โ”‚ Warning: Atlas Plan
โ”‚
โ”‚ with atlas_schema.myapp,
โ”‚ on main.tf line 18, in resource "atlas_schema" "myapp":
โ”‚ 18: resource "atlas_schema" "myapp" {
โ”‚
โ”‚ The following SQL statements will be executed:
โ”‚
โ”‚
โ”‚ CREATE TABLE `myapp`.`hello` (`world` text NULL, `thoughts` varchar(100) NULL) CHARSET utf8mb4 COLLATE utf8mb4_0900_ai_ci
โ”‚
โ•ต

Do you want to perform these actions?
Terraform will perform the actions described above.
Only 'yes' will be accepted to approve.

Enter a value:

Notice that the plan shows the SQL statements that will be executed to create the database schema as well as our loaded schema in its HCL representation - this was done by the schema loader that was used to load the schema from the schema.sql file.

If you are happy with the plan, type yes and press enter to apply the changes:

Do you want to perform these actions?
Terraform will perform the actions described above.
Only 'yes' will be accepted to approve.

Enter a value: yes

atlas_schema.myapp: Modifying... [id=mysql:///myapp]
atlas_schema.myapp: Modifications complete after 4s [id=mysql:///myapp]

Apply complete! Resources: 0 added, 1 changed, 0 destroyed.

Hooray! We have successfully created a database schema using Terraform and the Atlas provider.

Terraform's true power comes from its declarative nature - we feed it a desired state and it will make sure that the actual state matches the desired state. Atlas is a perfect match for this paradigm. Let's see what happens if we change the schema in the schema.sql file and run terraform apply again:

Update the contents of schema.sql to the following:

create table `groups` (
id int not null auto_increment primary key,
name varchar(255) not null
);

create table `users` (
id int not null auto_increment primary key,
name varchar(255) not null,
group_id int not null,
foreign key (group_id) references `groups` (id)
);

Re-apply the changes:

terraform apply

Observe that our plan includes the addition of the groups table as well as the foreign key constraint on the users table:

data.atlas_schema.sql: Reading...
data.atlas_schema.sql: Read complete after 4s [id=Qhci62i6CFYRQ2CmUOjMeA]
atlas_schema.myapp: Refreshing state... [id=mysql:///myapp]

Terraform used the selected providers to generate the following execution plan. Resource actions are indicated with the following
symbols:
~ update in-place

Terraform will perform the following actions:

# atlas_schema.myapp will be updated in-place
~ resource "atlas_schema" "myapp" {
~ hcl = <<-EOT
+ table "groups" {
+ schema = schema.myapp
+ column "id" {
+ null = false
+ type = int
+ auto_increment = true
+ }
+ column "name" {
+ null = false
+ type = varchar(255)
+ }
+ primary_key {
+ columns = [column.id]
+ }
+ }
table "users" {
schema = schema.myapp
column "id" {
null = false
type = int
auto_increment = true
}
column "name" {
null = false
type = varchar(255)
}
+ column "group_id" {
+ null = false
+ type = int
+ }
primary_key {
columns = [column.id]
}
+ foreign_key "users_ibfk_1" {
+ columns = [column.group_id]
+ ref_columns = [table.groups.column.id]
+ on_update = NO_ACTION
+ on_delete = NO_ACTION
+ }
+ index "group_id" {
+ columns = [column.group_id]
+ }
}
schema "myapp" {
charset = "utf8mb4"
collate = "utf8mb4_0900_ai_ci"
}
EOT
id = "mysql:///myapp"
# (1 unchanged attribute hidden)
}

Plan: 0 to add, 1 to change, 0 to destroy.
โ•ท
โ”‚ Warning: Atlas Plan
โ”‚
โ”‚ with atlas_schema.myapp,
โ”‚ on main.tf line 18, in resource "atlas_schema" "myapp":
โ”‚ 18: resource "atlas_schema" "myapp" {
โ”‚
โ”‚ The following SQL statements will be executed:
โ”‚
โ”‚
โ”‚ CREATE TABLE `myapp`.`groups` (`id` int NOT NULL AUTO_INCREMENT, `name` varchar(255) NOT NULL, PRIMARY KEY (`id`)) CHARSET
โ”‚ utf8mb4 COLLATE utf8mb4_0900_ai_ci
โ”‚ ALTER TABLE `myapp`.`users` ADD COLUMN `group_id` int NOT NULL, ADD INDEX `group_id` (`group_id`), ADD CONSTRAINT
โ”‚ `users_ibfk_1` FOREIGN KEY (`group_id`) REFERENCES `myapp`.`groups` (`id`) ON UPDATE NO ACTION ON DELETE NO ACTION
โ”‚
โ•ต

Do you want to perform these actions?
Terraform will perform the actions described above.
Only 'yes' will be accepted to approve.

Enter a value:

After typing yes and pressing enter, Terraform will apply the changes, bringing the actual state of the database schema in line with the desired state:

atlas_schema.myapp: Modifying... [id=mysql:///myapp]
atlas_schema.myapp: Modifications complete after 4s [id=mysql:///myapp]

Apply complete! Resources: 0 added, 1 changed, 0 destroyed.

Conclusionโ€‹

In this tutorial, we have seen how to use Terraform to manage the schema of a MySQL database using the Atlas provider with plain SQL. Using this workflow, teams can bridge the gap between their database schema management flows and their Terraform workflows, allowing for simpler and more reliable software delivery.

How can we make Atlas better?โ€‹

We would love to hear from you on our Discord server โค๏ธ.

ยท 5 min read
Tran Minh Giau

Introductionโ€‹

Today we are very excited to announce the release of Atlas Terraform Provider v0.4.0. This release brings some exciting new features and improvements to the provider which we will describe in this post.

In addition, this release is the first to be published under our new partnership with HashiCorp as a Technology Partner. Atlas is sometimes described as a "Terraform for Databases", so we have high hopes that this partnership will help us to bring many opportunities to create better ways for integrating database schema management into IaC workflows.

What's newโ€‹

When people first hear about integrating schema management into declarative workflows, many raise the concern that because making changes to the database is a high-risk operation, they would not trust a tool to do it automatically.

This is a valid concern, and this release contains three new features that we believe will help to address it:

  • SQL plan printing
  • Versioned migrations support
  • Migration safety verification

SQL Plan Printingโ€‹

In previous versions of the provider, we displayed the plan as a textual diff showing which resources are added, removed or modified. With this version, the provider will also print the SQL statements that will be executed as part of the plan.

For example, suppose we have the following schema:

schema "market" {
charset = "utf8mb4"
collate = "utf8mb4_0900_ai_ci"
comment = "A schema comment"
}

table "users" {
schema = schema.market
column "id" {
type = int
}
column "name" {
type = varchar(255)
}
primary_key {
columns = [
column.id
]
}
}

And our Terraform module looks like this:

terraform {
required_providers {
atlas = {
source = "ariga/atlas"
version = "0.4.0"
}
}
}

provider "atlas" {}

data "atlas_schema" "market" {
src = file("${path.module}/schema.hcl")
dev_db_url = "mysql://root:pass@localhost:3307"
}

resource "atlas_schema" "market" {
hcl = data.atlas_schema.market.hcl
url = "mysql://root:pass@localhost:3306"
dev_db_url = "mysql://root:pass@localhost:3307"
}

When we run terraform plan we will see the following output:

Plan: 1 to add, 0 to change, 0 to destroy.
โ•ท
โ”‚ Warning: Atlas Plan
โ”‚
โ”‚ with atlas_schema.market,
โ”‚ on main.tf line 17, in resource "atlas_schema" "market":
โ”‚ 17: resource "atlas_schema" "market" {
โ”‚
โ”‚ The following SQL statements will be executed:
โ”‚
โ”‚
โ”‚ -- add new schema named "market"
โ”‚ CREATE DATABASE `market`
โ”‚ -- create "users" table
โ”‚ CREATE TABLE `market`.`users` (`id` int NOT NULL, `name` varchar(255) NOT NULL, PRIMARY KEY (`id`)) CHARSET utf8mb4 COLLATE utf8mb4_0900_ai_ci
โ”‚

Versioned migrationsโ€‹

Atlas supports two types of workflows: Declarative and Versioned. With declarative workflows, the plan to migrate the database is generated automatically at runtime. Versioned migrations provide teams with a more controlled workflow where changes are planned, checked in to source control and reviewed ahead of time. Until today, the Terraform provider only supported the declarative workflow. This release adds support for versioned migrations as well.

Suppose we have the following migration directory of two files:

20221101163823_create_users.sql
CREATE TABLE `users` (
`id` bigint(20) NOT NULL AUTO_INCREMENT,
`age` bigint(20) NOT NULL,
`name` varchar(255) COLLATE utf8mb4_bin NOT NULL,
PRIMARY KEY (`id`),
UNIQUE KEY `age` (`age`)
);
atlas.sum
h1:OlaV3+7xXEWc1uG/Ed2zICttHaS6ydHZmzI7Hpf2Fss=
20221101163823_create_users.sql h1:mZirkpXBoLLm+M73EbHo07muxclifb70fhWQFfqxjD4=

We can use the Terraform Atlas provider to apply this migration directory to a database:

terraform {
required_providers {
atlas = {
source = "ariga/atlas"
version = "0.4.0"
}
}
}

provider "atlas" {}

// The `atlas_migration` data source loads the current state of the given database
// with regard to the migration directory.
data "atlas_migration" "hello" {
dir = "migrations?format=atlas"
url = "mysql://root:pass@localhost:3306/hello"
}

// The `atlas_migration` resource applies the migration directory to the database.
resource "atlas_migration" "hello" {
dir = "migrations?format=atlas"
version = data.atlas_migration.hello.latest # Use latest to run all migrations
url = data.atlas_migration.hello.url
dev_url = "mysql://root:pass@localhost:3307/test"
}

Running terraform plan will show the following output:

data.atlas_migration.hello: Reading...
data.atlas_migration.hello: Read complete after 0s [id=migrations?format=atlas]

Terraform used the selected providers to generate the following execution plan.
Resource actions are indicated with the following symbols:
+ create

Terraform will perform the following actions:

# atlas_migration.hello will be created
+ resource "atlas_migration" "hello" {
+ dev_url = (sensitive value)
+ dir = "migrations?format=atlas"
+ id = (known after apply)
+ status = (known after apply)
+ url = (sensitive value)
+ version = "20221101163823"
}

Plan: 1 to add, 0 to change, 0 to destroy.

Lintingโ€‹

Atlas provides extensive support for linting database schemas. This release adds support for linting schemas as part of the Terraform plan. This means that you can now run terraform plan and see if there are any linting errors in your schema. This is especially useful when you are using the versioned migrations workflow, as you can now run terraform plan to see if there are any linting errors in your schema before you apply the changes.

Suppose we add the following migration:

20221101165036_change_unique.sql
ALTER TABLE users
DROP KEY age,
ADD CONSTRAINT NAME UNIQUE (`name`);

If we run terraform plan on the above schema, Terraform prints the following warning:

โ•ท
โ”‚ Warning: data dependent changes detected
โ”‚
โ”‚ with atlas_migration.hello,
โ”‚ on main.tf line 20, in resource "atlas_migration" "hello":
โ”‚ 20: resource "atlas_migration" "hello" {
โ”‚
โ”‚ File: 20221101165036_change_unique.sql
โ”‚
โ”‚ - MF101: Adding a unique index "NAME" on table "users" might fail in case column
โ”‚ "name" contains duplicate entries
โ•ต

Atlas detected that the migration may fail in case the column name contains duplicate entries! This is a very useful warning that can help you avoid unpredicted failed deployments. Atlas supports many more safety checks, which you can read about here.

Wrapping upโ€‹

In this blogpost we have discussed three new features that were added to the Terraform Atlas provider that are designed to make it safer and more predictable to manage your database schemas with Terraform. We hope you will enjoy this release!

Have questions? Feedback? Feel free to reach out on our Discord server.

ยท 5 min read
Amit Shani

Today we are glad to announce the release of the official Atlas Terraform Provider.

What is Terraformโ€‹

Terraform is a popular open-source tool created by HashiCorp, used to greatly simplify the task of provisioning and managing resources in the cloud. With Terraform, organizations can describe the desired state of their infrastructure in a simple configuration language and let Terraform plan and apply these changes in an automated way. This way, Terraform allows teams to truly deliver infrastructure-as-code (IaC), which completely change how teams and organizations manage their cloud infrastructure.

Infrastructure-as-Code and database managementโ€‹

Most cloud-native applications are backed by a database. The database is often the most critical part of many software systems, so making changes to its schema (structure and layout of the data inside) is a very risky business. However, schemas must evolve: as functionality changes over time, the backing tables are added, columns are dropped, indexes are created for performance reasons, and more.

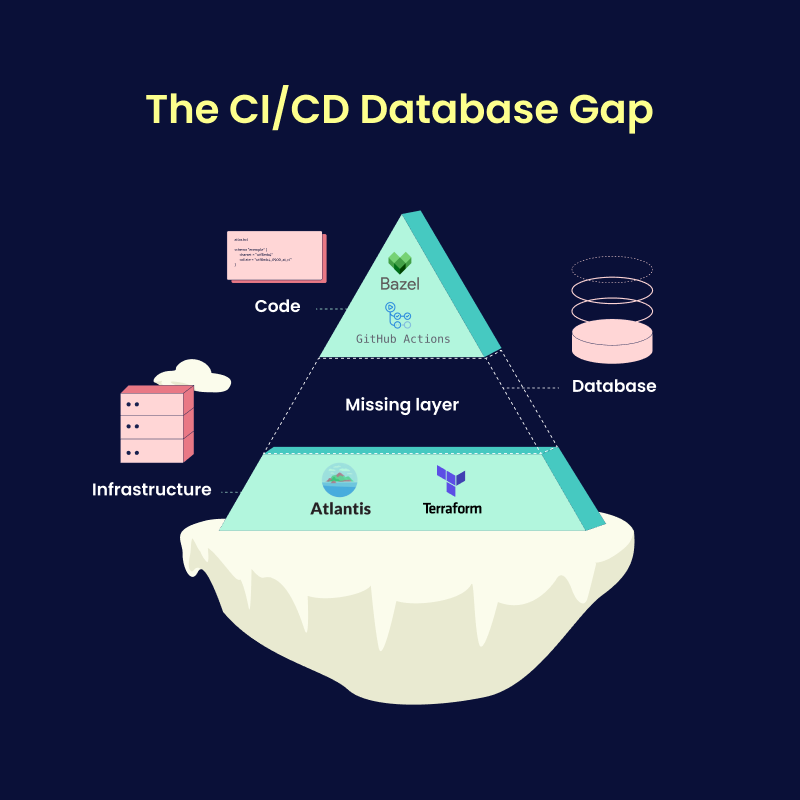
Therefore it is surprising that there is no established way of integrating the management of schema changes (commonly called schema "migrations") into popular Infrastructure-as-Code workflows. For this reason, many organizations are running migrations from within the application code or using solutions outside the ecosystem of Terraform, meaning that management of the production environment is fragmented and hard to synchronize. Atlas aims to change that.

The Atlas Terraform provider allows you to synchronize your database with your desired schema, in a safe and stateful manner. By using Atlasโ€™s core migration engine and embedding it in a Terraform provider, we are enabling teams to manage their database schemas as part of their full IaC workflow. This way, teams can use existing providers (such as AWS or GCP) to provision the database instance and use the Atlas provider to keep the schema in sync. Integrating Atlas with Terraform is especially useful because it couples the state of the infrastructure with the state of the database. It is also extremely neat when using a dev database, which is a feature that combines infrastructure and DB management to provide safety and correctness.

Demoโ€‹

Prerequisitesโ€‹

Make sure you have installed:

Letโ€™s see an example of the provider in action. First, spin a database using docker:

docker run -p 3306:3306 --name iloveatlas -e MYSQL_ROOT_PASSWORD=pass -e MYSQL_DATABASE=market -d mysql:8

Great! Now we have an instance of MySQL database running.

As an extra measure of safety, we will run another identical database which will serve as a Dev Database. In short, the dev-db helps to catch errors that can only be detected when applying the schema. It is also useful to format the schema in a correct and predictable way. Read more about it here. Run a second instance of MySQL on another port, to serve as a dev-db:

docker run -p 3307:3306 --name devdb-greatness -e MYSQL_ROOT_PASSWORD=pass -e MYSQL_DATABASE=market -d mysql:8

Next, we need an HCL file describing the desired state of our database. You can use atlas cli to inspect the state of another database or you can use the following basic schema:

schema.hcl
table "orders" {
schema = schema.market
column "id" {
null = false
type = int
auto_increment = true
}
column "name" {
null = false
type = varchar(20)
}
primary_key {
columns = [column.id]
}
}

schema "market" {
charset = "utf8mb4"
collate = "utf8mb4_0900_ai_ci"
}

Save the schema file locally in a file named schema.hcl.

Now that we have our database schema we can use terraform to apply that schema to our database. Create a file named main.tf and copy the following snippet:

main.tf
terraform {
required_providers {
atlas = {
version = "~> 0.4.0"
source = "ariga/atlas"
}
}
}

provider "atlas" {}

data "atlas_schema" "market" {
dev_db_url = "mysql://root:pass@localhost:3307/market"
src = file("${path.module}/schema.hcl")
}

resource "atlas_schema" "market" {
hcl = data.atlas_schema.market.hcl
url = "mysql://root:pass@localhost:3306/market"
dev_db_url = "mysql://root:pass@localhost:3307/market"
}

Finally, init terraform:

terraform init

And apply the schema to the database by executing:

terraform apply --auto-approve

Awesome! Now your database should have a table named orders. To verify that we can connect to the database:

$ docker exec -it iloveatlas mysql -ppass --database=market

mysql> show tables;
+------------------+
| Tables_in_market |
+------------------+
| orders |
+------------------+
1 row in set (0.00 sec)

mysql> show create table orders;
+--------+------------------------------------------------------------------------------------------------------------------------------------------------------------------------------------+
| Table | Create Table |
+--------+------------------------------------------------------------------------------------------------------------------------------------------------------------------------------------+
| orders | CREATE TABLE `orders` (
`id` int NOT NULL AUTO_INCREMENT,
`name` varchar(20) NOT NULL,
PRIMARY KEY (`id`)
) ENGINE=InnoDB DEFAULT CHARSET=utf8mb4 COLLATE=utf8mb4_0900_ai_ci |
+--------+------------------------------------------------------------------------------------------------------------------------------------------------------------------------------------+
1 row in set (0.00 sec)

For more examples and documentation visit the official GitHub repository or the provider page on Terraform registry.

What's nextโ€‹

In this post, we presented the Atlas Terraform Provider. The provider currently supports the basic, declarative migration workflow that is available in the Atlas engine. In upcoming versions, we will add support for an additional kind of workflow that is supported by the engine and is called versioned migration authoring. In addition, more advanced safety checks (such as simulation on database snapshots) and migration strategies are also being worked on.

While the Terraform provider has just been released, the core engine that it is driving, is well tested and widely used (especially as the migration engine backing the popular Ent framework.) If you, like me, have always wanted to manage your database schema as part of your team's infrastructure-as-code workflow, give the Atlas Terraform provider a try!

Have questions? Feedback? Find our team on our Discord server.