Webhooks
To receive webhooks notifications about schema changes and drifts in your schema, you can set them up in Atlas Schema Monitoring. webhooks can be sent to Slack, Workplace, or any HTTP endpoint.
Setting up Webhooks
-
Log in to your Atlas Cloud account at https://auth.atlasgo.cloud.
-
Click on Monitoring in the top-level navigation on the left side of the screen.
-
Choose the database you want to monitor and click on the Webhooks tab.
-
Click on the Add Webhook button
-
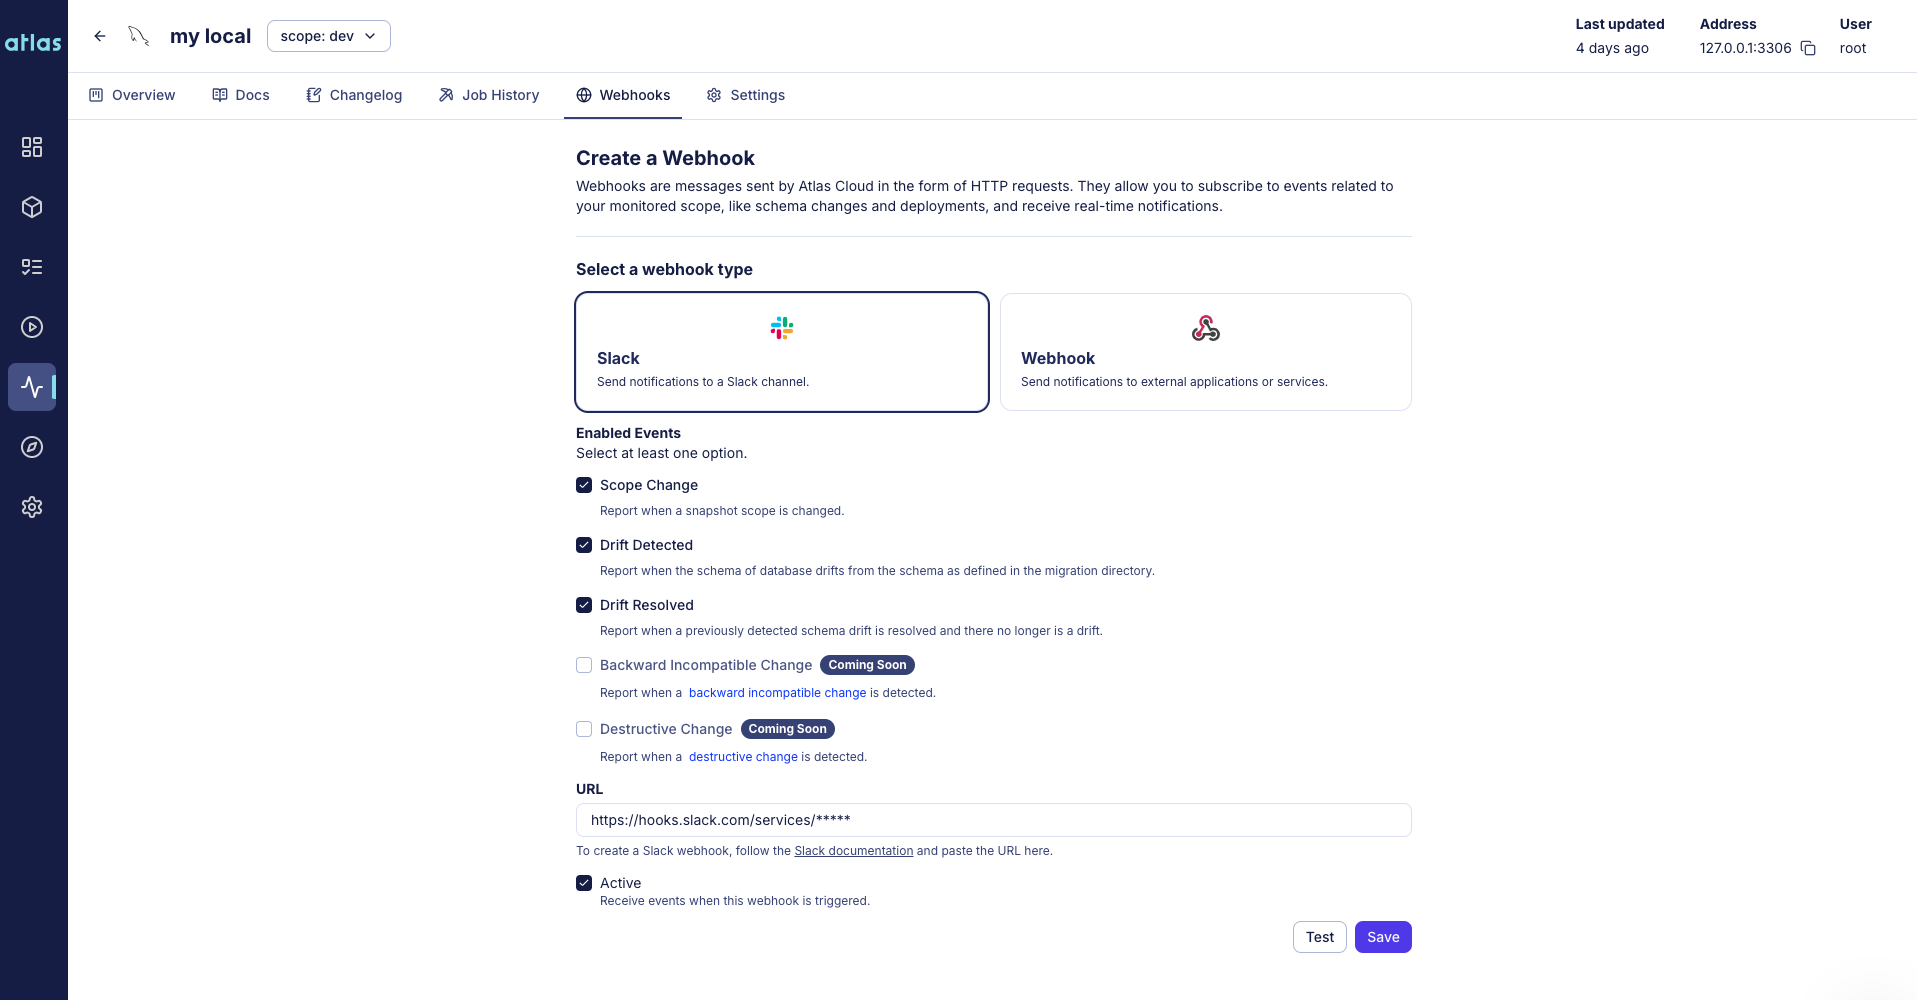
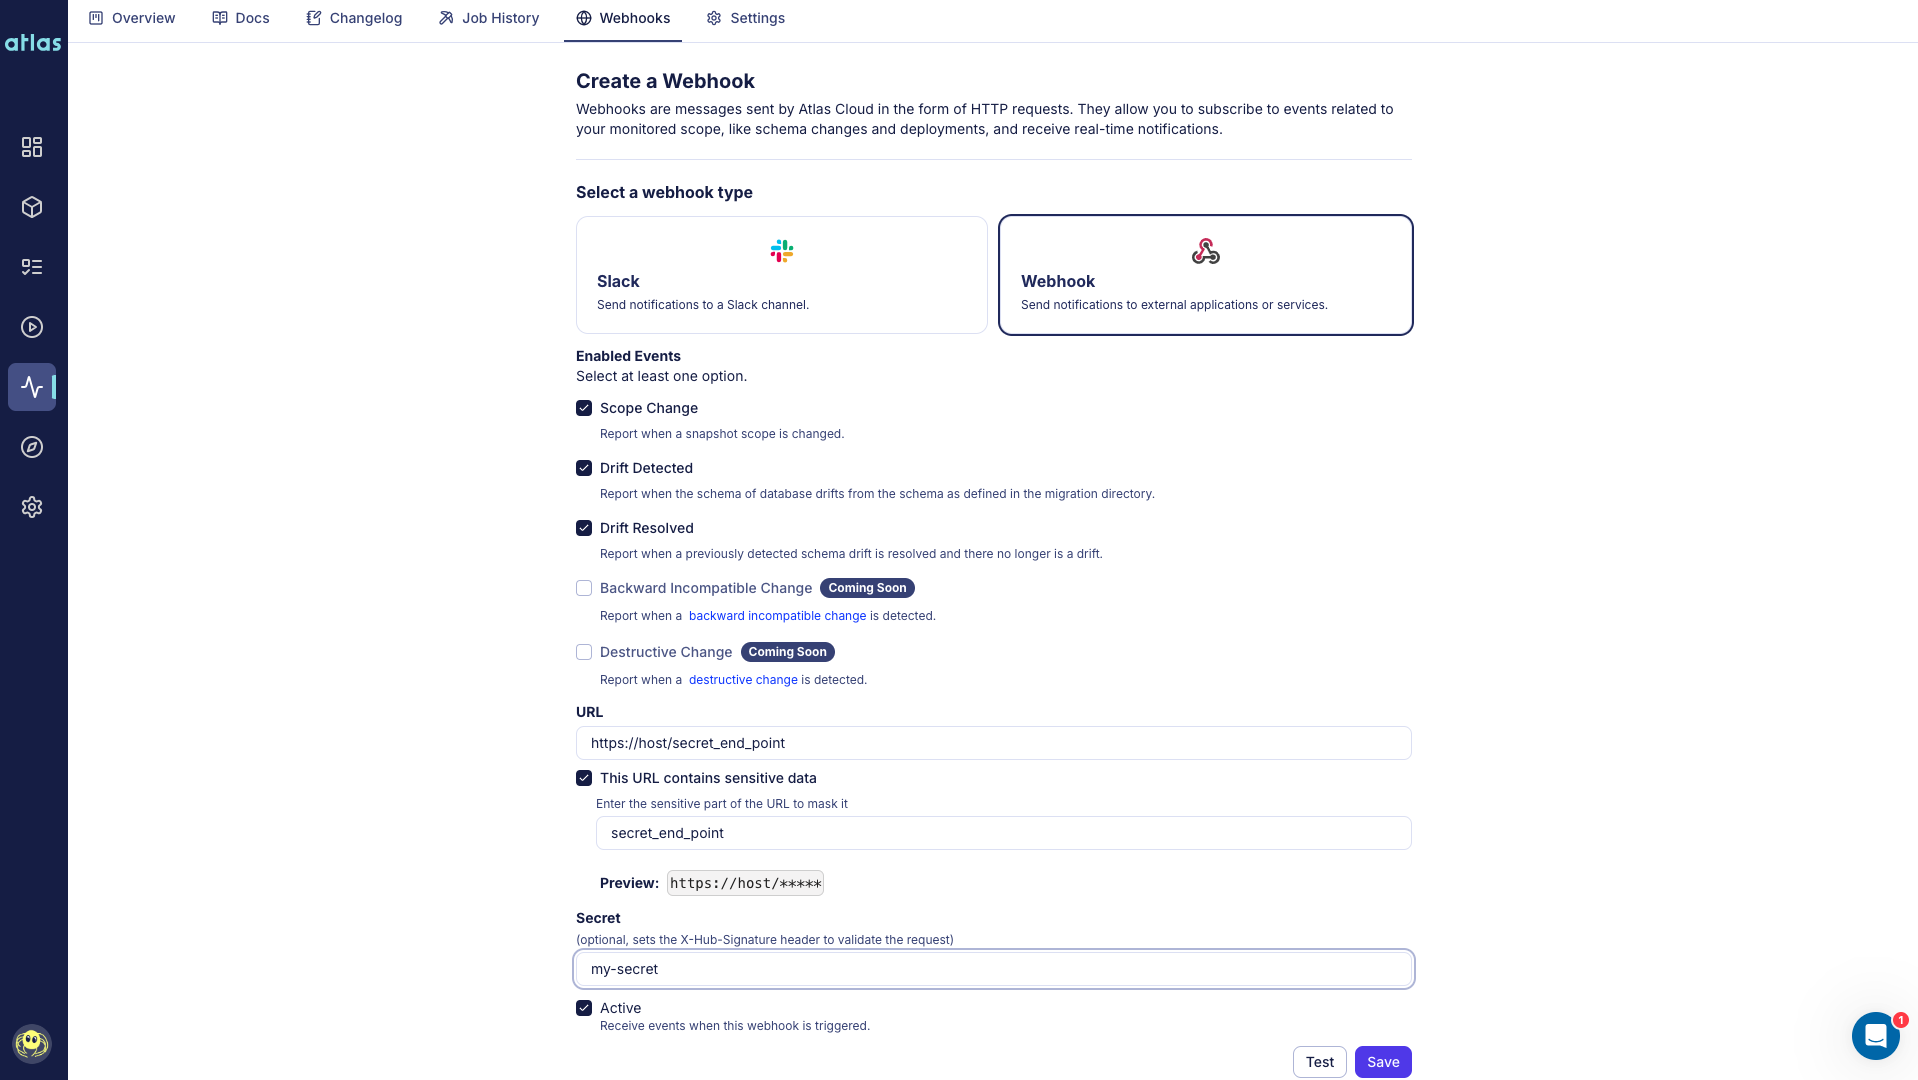
Select the integration type and fill in the required information.
- Slack
- Webhook
URL (Required) - the URL of the slack integration, you can create one here.

URL (Required) - The URL of the HTTP endpoint where the webhook will be sent.
Sensitive Part (Optional) - The sensitive part of the URL will be hidden in the UI.
Secret (Optional) - The secret key used to sign the webhook body by using X-Hub-Signature header.

To test your configuration, use the Send Test Notification button.

After setting up the webhook, you will receive webhooks whenever there are a schema changes in the database.
Testing Webhooks
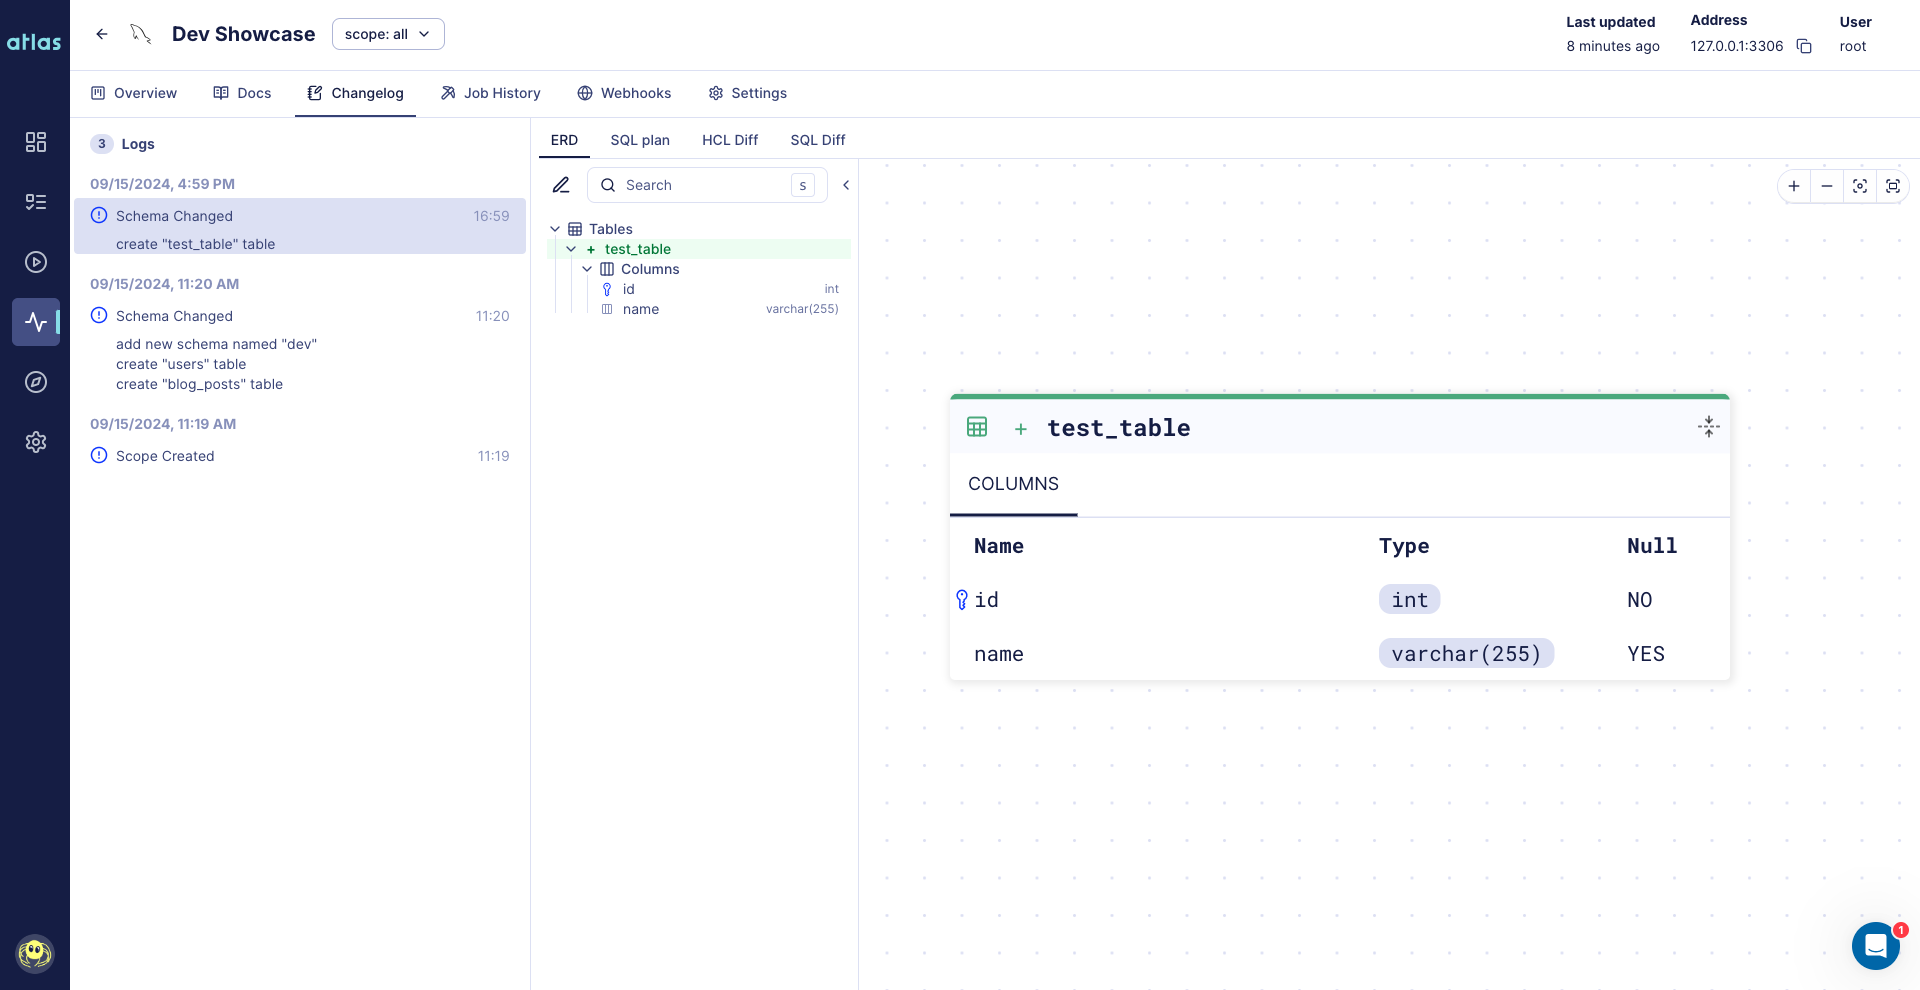
Let's create new table in our database and see how the webhook notification works.
CREATE TABLE test_table (
    id INT PRIMARY KEY,
    name VARCHAR(255)
);
Now, hit the Refresh button inside the Overview tab to trigger schema snapshot of the database.
Now, you should receive a webhook about the schema change.

When clicking on the link inside the message, you will be redirected to the Changelog tab, where you can see the details of the schema change.
