Working with Atlas Registry
In the past, we have recommended users to build a migrations Docker image as part of their CI pipeline and then use that image during their deployment process. This is still a valid approach, as it bundles together the Atlas binary needed to run migrations with the migrations themselves. However, over the last years we have received feedback from many users that this approach is cumbersome and requires a lot of boilerplate code to be written.
To address this, we have introduced the Atlas Schema Registry, which allows you to store schemas and migrations in the cloud and make them available later to your deployment pipelines by their tags.
On a high-level this approach works as follows:
- Users sync their migration directory to the Atlas Registry whenever a new migration is merged to the main branch. Learn more about it in the Syncing Migration Directories doc.
- During deployment, Atlas fetches the migration directory from the Atlas Registry by its tag (defaults to
latest) and applies the migrations to the database.
This guide shows you how to set up this approach for your project.
Prerequisites
- An Atlas Cloud account with administrator access. If you don't have an account, you can sign up for free.
- Sync your migration directory from GitHub to your Atlas Cloud account. See Syncing Migration Directories for more information.
- A token for an Atlas Cloud Bot user with permissions report CI/CD runs and read the migration directory. See Creating a Bot User for more information.
Deploying migrations using Atlas Registry
Once your migration directory is pushed to the Registry, you can use the atlas CLI to fetches the migration directory
from the Atlas Registry and apply the migrations to the database.
To get started, create a project configuration file named atlas.hcl:
env {
  name = atlas.env
  url  = getenv("DATABASE_URL")
  migration {
    dir = "atlas://<name of dir>"
  }
}
Let's review what this configuration file does:
- We define an environment using the
envblock. To avoid setting database credentials in the configuration file, we use theDATABASE_URLenvironment variable. - To fetch the migration directory from the Atlas Registry we use the
atlas://<name of dir>URL in themigration.dirattribute. The name is the same as the name you used when you synced your migration directory.
Read Migrations from Atlas Registry
Once you have created your configuration file, you can read the available migrations from the Atlas Registry and apply
them to the database using the atlas CLI using the following commands:
- In Local Development
- In CI/CD Pipelines
# Login first to Atlas Cloud.
atlas login
# Run migrations. Give an environment name, such as --env local.
atlas migrate apply --env local
Let's review what these commands do:
- We run the
atlas logincommand to authenticate with Atlas Cloud. - We run the
atlas migrate applycommand to apply migrations to the database. The--envflag is used to specify the name of the environment we defined in the configuration file.
ATLAS_TOKEN="{{ YOUR_ATLAS_TOKEN }}" atlas migrate apply --env production
Let's review what these commands do:
- We set the
ATLAS_TOKENenvironment variable to the token we created earlier in the CI/CD pipeline. - We run the
atlas migrate applycommand to apply migrations to the database. The--envflag is used to specify the name of the environment we defined in the configuration file.
The atlas migrate apply command will run all migrations that have not been applied to the database yet:
Migrating to version 20230306221009 (1 migrations in total):

  -- migrating version 20230306221009
    -> create table users (
         id int primary key
       );
  -- ok (8.60933ms)

  -------------------------
  -- 68.037117ms
  -- 1 migrations
  -- 1 sql statements
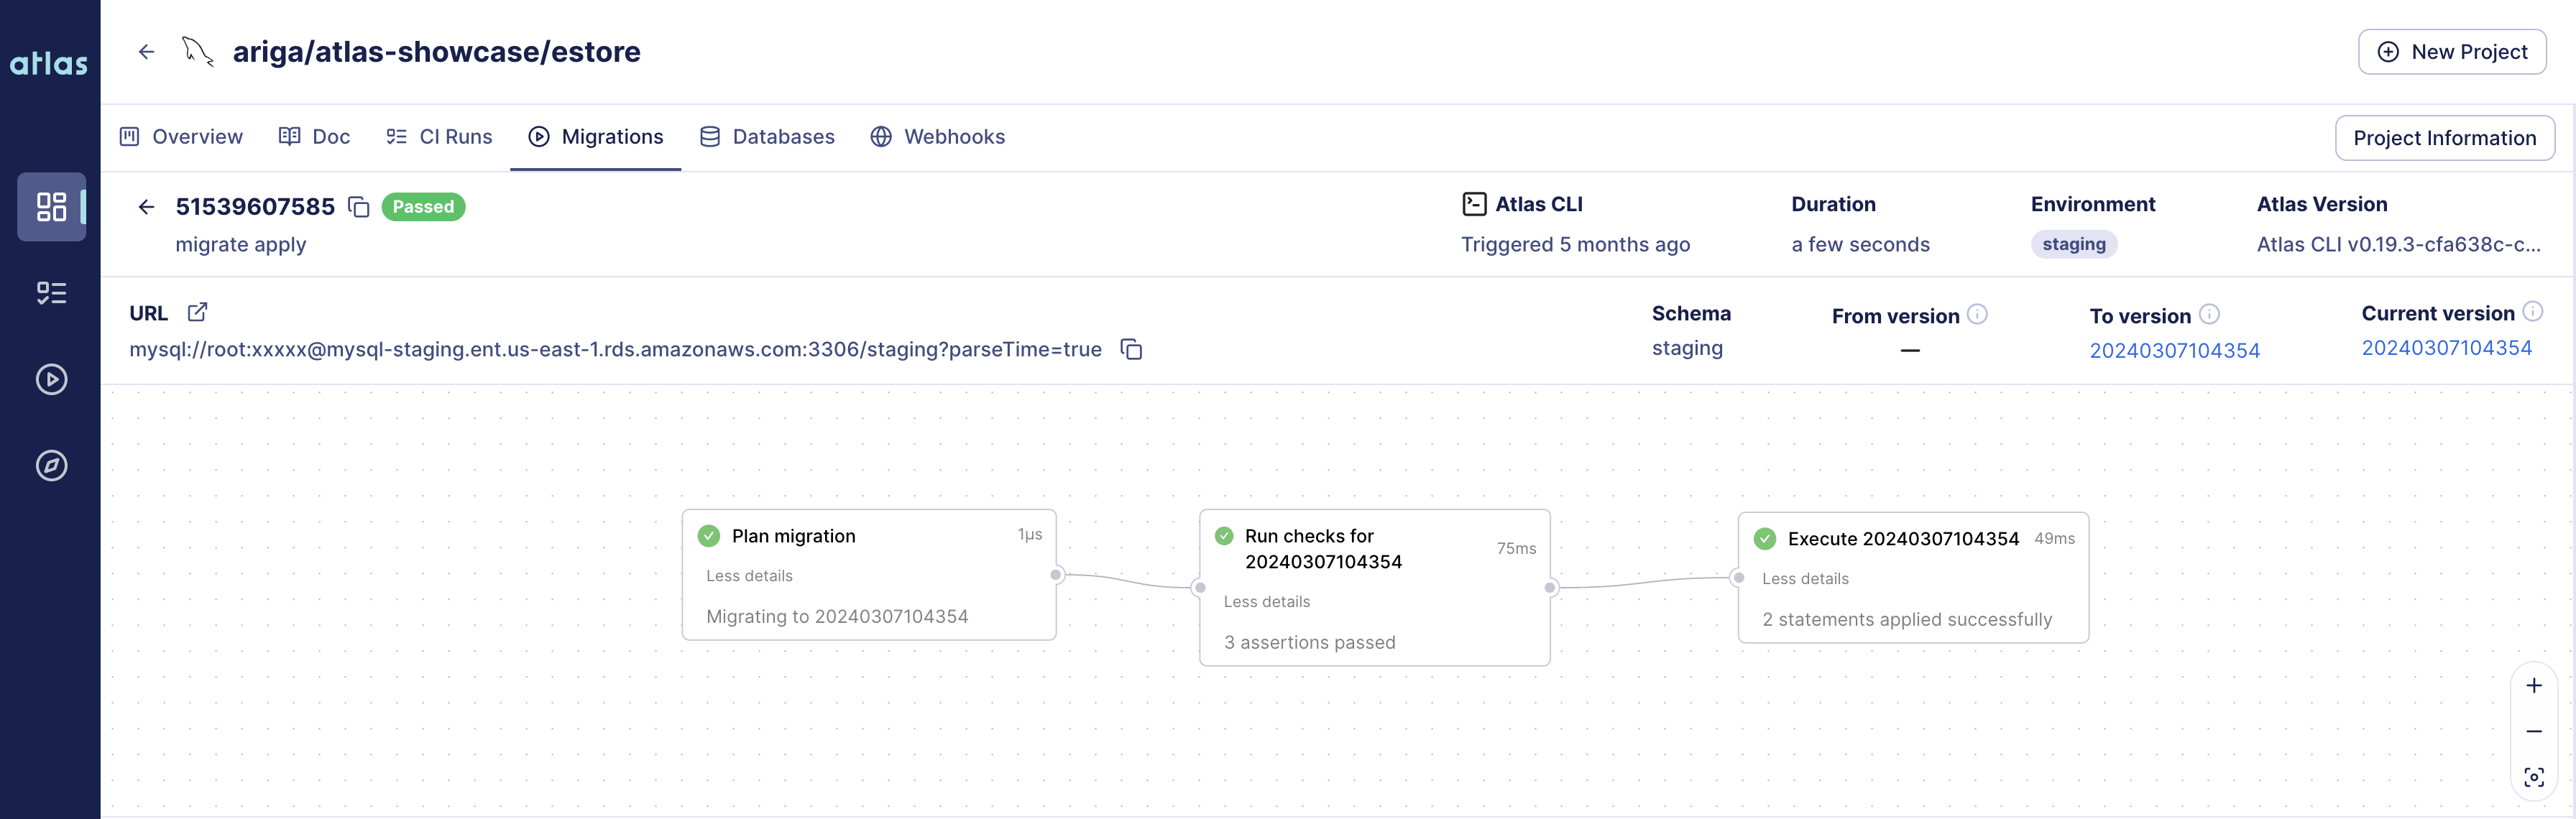
Viewing migration logs in Atlas Cloud
After the migrations have been applied, you can view them in Atlas Cloud by heading to the /deployments page
in your Atlas Cloud account. You should see a new migration log with the name of the environment you specified in
the configuration file. Clicking on the migration-log will show you the details of the migration, including the
statements and checks that were applied: