Quick Introduction
Atlas is a language-independent tool for managing and migrating database schemas using modern DevOps principles. It offers two workflows:
-
Declarative: Similar to Terraform, Atlas compares the current state of the database to the desired state, as defined in an HCL, SQL, or ORM schema. Based on this comparison, it generates and executes a migration plan to transition the database to its desired state.
-
Versioned: Unlike other tools, Atlas automatically plans schema migrations for you. Users can describe their desired database schema in HCL, SQL, or their chosen ORM, and by utilizing Atlas, they can plan, lint, and apply the necessary migrations to the database.
Installation
- macOS + Linux
- Homebrew
- Docker
- Windows
- Manual Installation
To download and install the latest release of the Atlas CLI, simply run the following in your terminal:
curl -sSf https://atlasgo.sh | sh
Get the latest release with Homebrew:
brew install ariga/tap/atlas
To pull the Atlas image and run it as a Docker container:
docker pull arigaio/atlas
docker run --rm arigaio/atlas --help
If the container needs access to the host network or a local directory, use the --net=host flag and mount the desired
directory:
docker run --rm --net=host \
  -v $(pwd)/migrations:/migrations \
  arigaio/atlas migrate apply
  --url "mysql://root:pass@:3306/test"
Download the latest release and move the atlas binary to a file location on your system PATH.
The default binaries distributed in official releases are released under the Atlas EULA. If you would like obtain a copy of Atlas Community Edition (under an Apache 2 license) follow the instructions here.
Start a local database container
For the purpose of this guide, we will start a local Docker container running MySQL.
docker run --rm -d --name atlas-demo -p 3306:3306 -e MYSQL_ROOT_PASSWORD=pass -e MYSQL_DATABASE=example mysql
For this example, we will start with a schema that represents a users table, in which each user has an ID and a name:
CREATE table users (
  id int PRIMARY KEY,
  name varchar(100)
);
To create the table above on our local database, we can run the following command:
docker exec atlas-demo mysql -ppass -e 'CREATE table example.users(id int PRIMARY KEY, name varchar(100))'
Inspecting our database
The atlas schema inspect command supports reading the database description provided by a URL and outputting it in
three different formats: Atlas DDL (default), SQL, and JSON. In this guide, we will
demonstrate the flow using both the Atlas DDL and SQL formats, as the JSON format is often used for processing the
output using jq.
- Atlas DDL (HCL)
- SQL
To inspect our locally-running MySQL instance, use the -u flag and write the output to a file named schema.hcl:
atlas schema inspect -u "mysql://root:pass@localhost:3306/example" > schema.hcl
Open the schema.hcl file to view the Atlas schema that describes our database.
table "users" {
  schema = schema.example
  column "id" {
    null = false
    type = int
  }
  column "name" {
    null = true
    type = varchar(100)
  }
  primary_key {
    columns = [column.id]
  }
}
This block represents a table resource with id, and name
columns. The schema field references the example schema that is defined elsewhere
in this document. In addition, the primary_key sub-block defines the id column as
the primary key for the table. Atlas strives to mimic the syntax of the database that the user is working against. In this case, the
type for the id column is int, and varchar(100) for the name column.
To inspect our locally-running MySQL instance, use the -u flag and write the output to a file named schema.sql:
atlas schema inspect -u "mysql://root:pass@localhost:3306/example" --format '{{ sql . }}' > schema.sql
Open the schema.sql file to view the inspected SQL schema that describes our database.
-- create "users" table
CREATE TABLE `users` (
  `id` int NOT NULL,
  `name` varchar(100) NULL,
  PRIMARY KEY (`id`)
) CHARSET utf8mb4 COLLATE utf8mb4_0900_ai_ci;
Now, consider we want to add a blog_posts table and have our schema represent a simplified
blogging system.
Let's add the following to our inspected schema, and use Atlas to plan and apply the changes to our database.
- Atlas DDL (HCL)
- SQL
Edit the schema.hcl file and add the following table block:
table "blog_posts" {
  schema = schema.example
  column "id" {
    null = false
    type = int
  }
  column "title" {
    null = true
    type = varchar(100)
  }
  column "body" {
    null = true
    type = text
  }
  column "author_id" {
    null = true
    type = int
  }
  primary_key {
    columns = [column.id]
  }
  foreign_key "author_fk" {
    columns     = [column.author_id]
    ref_columns = [table.users.column.id]
  }
}
In addition to the elements we saw in the users table, here we can find a foreign key
block, declaring that the author_id column references the id column on the
users table.
Edit the schema.sql file and add the following CREATE TABLE statement:
-- create "blog_posts" table
CREATE TABLE `blog_posts` (
  `id` int NOT NULL,
  `title` varchar(100) NULL,
  `body` text NULL,
  `author_id` int NULL,
  PRIMARY KEY (`id`),
  CONSTRAINT `author_fk` FOREIGN KEY (`author_id`) REFERENCES `example`.`users` (`id`)
);
Now, let's apply these changes by running a migration. In Atlas, migrations can be applied in two types of workflows: declarative and versioned.
Declarative Migrations
The declarative approach requires the user to define the desired end schema, and Atlas provides a safe way to alter the database to get there. Let's see this in action.
Continuing the example, in order to apply the changes to our database we will run the apply command:
- Atlas DDL (HCL)
- SQL
atlas schema apply \
  -u "mysql://root:pass@localhost:3306/example" \
  --to file://schema.hcl
atlas schema apply \
  -u "mysql://root:pass@localhost:3306/example" \
  --to file://schema.sql \
  --dev-url "docker://mysql/8/example"
Atlas presents the plan it created by displaying the SQL statements. For example, for a MySQL database we will see the following:
-- Planned Changes:
-- Create "blog_posts" table
CREATE TABLE `example`.`blog_posts` (`id` int NOT NULL, `title` varchar(100) NULL, `body` text NULL, `author_id` int NULL, PRIMARY KEY (`id`), INDEX `author_id` (`author_id`), CONSTRAINT `author_fk` FOREIGN KEY (`author_id`) REFERENCES `example`.`users` (`id`))
Use the arrow keys to navigate: ↓ ↑ → ←
? Are you sure?:
  ▸ Apply
    Abort
Apply the changes, and that's it! You have successfully run a declarative migration.
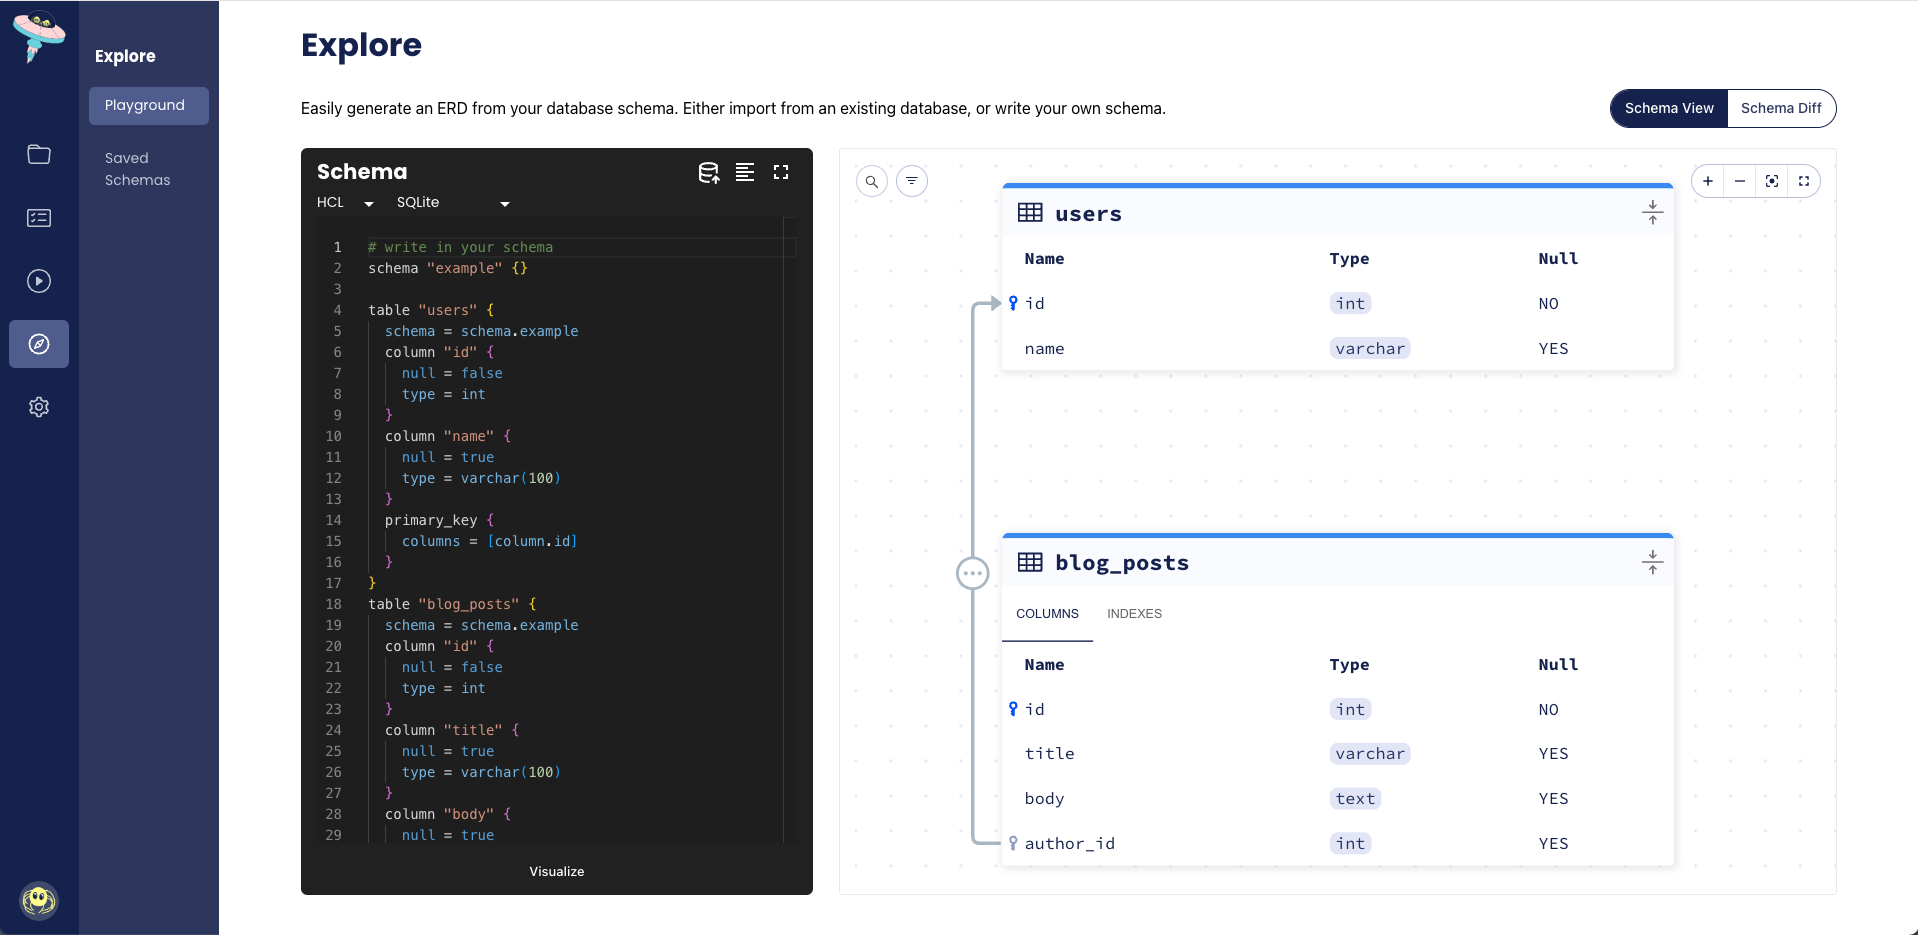
To ensure that the changes have been made to the schema, you can run the inspect command again. This time, we use
the --web/-w flag to open the Atlas Web UI and view the schema.
atlas schema inspect \
  -u "mysql://root:pass@localhost:3306/example" \
  --web
If you are using an old version of Atlas, you may need to replace the --web flag with --visualize.
Versioned Migrations
Alternatively, the versioned migration workflow, sometimes called "change-based migrations", allows each change to the database schema to be checked-in to source control and reviewed during code-review. Users can still benefit from Atlas intelligently planning migrations for them, however they are not automatically applied.
To start, we will calculate the difference between the desired and current state of the database by running the atlas migrate diff command.
To run this command, we need to provide the necessary parameters:
--dirthe URL to the migration directory, by default it isfile://migrations.--tothe URL of the desired state. A state can be specified using a database URL, HCL or SQL schema, or another migration directory.--dev-urla URL to a Dev Database that will be used to compute the diff.
- Atlas DDL (HCL)
- SQL
atlas migrate diff create_blog_posts \
  --dir "file://migrations" \
  --to "file://schema.hcl" \
  --dev-url "docker://mysql/8/example"
atlas migrate diff create_blog_posts \
  --dir "file://migrations" \
  --to "file://schema.sql" \
  --dev-url "docker://mysql/8/example"
Run ls migrations, and you will notice that Atlas has created two files:
- 20220811074144_create_blog_posts.sql
- atlas.sum
-- create "blog_posts" table
CREATE TABLE `example`.`blog_posts` (`id` int NOT NULL, `title` varchar(100) NULL, `body` text NULL, `author_id` int NULL, PRIMARY KEY (`id`), INDEX `author_id` (`author_id`), CONSTRAINT `author_fk` FOREIGN KEY (`author_id`) REFERENCES `example`.`users` (`id`))
In addition to the migration directory, Atlas maintains a file name atlas.sum which is used
to ensure the integrity of the migration directory and force developers to deal with situations
where migration order or contents was modified after the fact.
h1:t1fEP1rSsGf1gYrYCjsGyEyuM0cnhATlq93B7h8uXxY=
20220811074144_create_blog_posts.sql h1:liZcCBbAn/HyBTqBAEVar9fJNKPTb2Eq+rEKZeCFC9M=
Now that we have our migration files ready, you can use the migrate apply command to apply the changes to the database.
To learn more about this process, check out the Versioned Migrations Quickstart Guide
Next Steps
In this short tutorial we learned how to use Atlas to inspect databases, as well as use declarative and versioned migrations. Read more about the use-cases for the two approaches here to help you decide which workflow works best for you.
We have a super friendly #getting-started channel on our community chat on Discord.
For web-based, free, and fun (GIFs included) support:
Join our Discord server
