Visualizing GORM Schemas
Visualizing a database schema using an Entity-Relationship Diagram (ERD) tool is helpful in providing a clear and intuitive representation of the database structure, making it easier to understand the relationships and dependencies between different entities.
With Atlas, you can easily visualize your GORM schema.
Getting started with Atlas and GORM
Before we continue, ensure you have installed the Atlas GORM Provider on your GORM project.
To set up, follow along the getting started guide for GORM and Atlas.
Project Setup
GORM Schema
Assume we have the following GORM models.go file:
package models

import (
	"gorm.io/gorm"
)

type User struct {
	gorm.Model
	Username  string `gorm:"uniqueIndex;not null"`
	Email     string `gorm:"uniqueIndex;not null"`
	Posts 	  []Post
	Comments  []Comment
}

type Post struct {
	gorm.Model
	Title    string `gorm:"not null"`
	Content  string `gorm:"type:text;not null"`
	UserID   uint
	Comments []Comment
}

type Comment struct {
	gorm.Model
	Content string `gorm:"type:text;not null"`
	UserID  uint
	PostID  uint
}
Above we see three types: User, Post and Comment. The User model includes fields for username and email.
The Post model contains fields for title and content, referencing the user who created it and allowing for multiple comments.
The Comment model includes the content of the comment and references both the user and the post.
Config File
Before we begin testing, create a config file named
atlas.hcl.
In this file we will create an environment, specify the source of our schema, and a URL for our dev database.
Be sure to update the --path in the config file with the correct path, as well as --dialect and dev
depending on which database you are using.
data "external_schema" "gorm" {
  program = [
  "go",
  "run",
  "-mod=mod",
  "ariga.io/atlas-provider-gorm",
  "load",
  "--path", "./path/to/models",
  "--dialect", "postgres", // | mysql | sqlite | sqlserver
  ]
}

env "gorm" {
  src = data.external_schema.gorm.url
  dev = "docker://postgres/15/dev?search_path=public"
}
Visualizing
Now that we are all setup, we can visualize our GORM types by running the inspect command
with the -w flag:
atlas schema inspect --env gorm --url env://src -w
If you are not logged in, the output should be similar to:
? Where would you like to share your schema visualization?:
  ▸ Publicly (gh.atlasgo.cloud)
  Your personal workspace (requires 'atlas login')
Our browser should open:
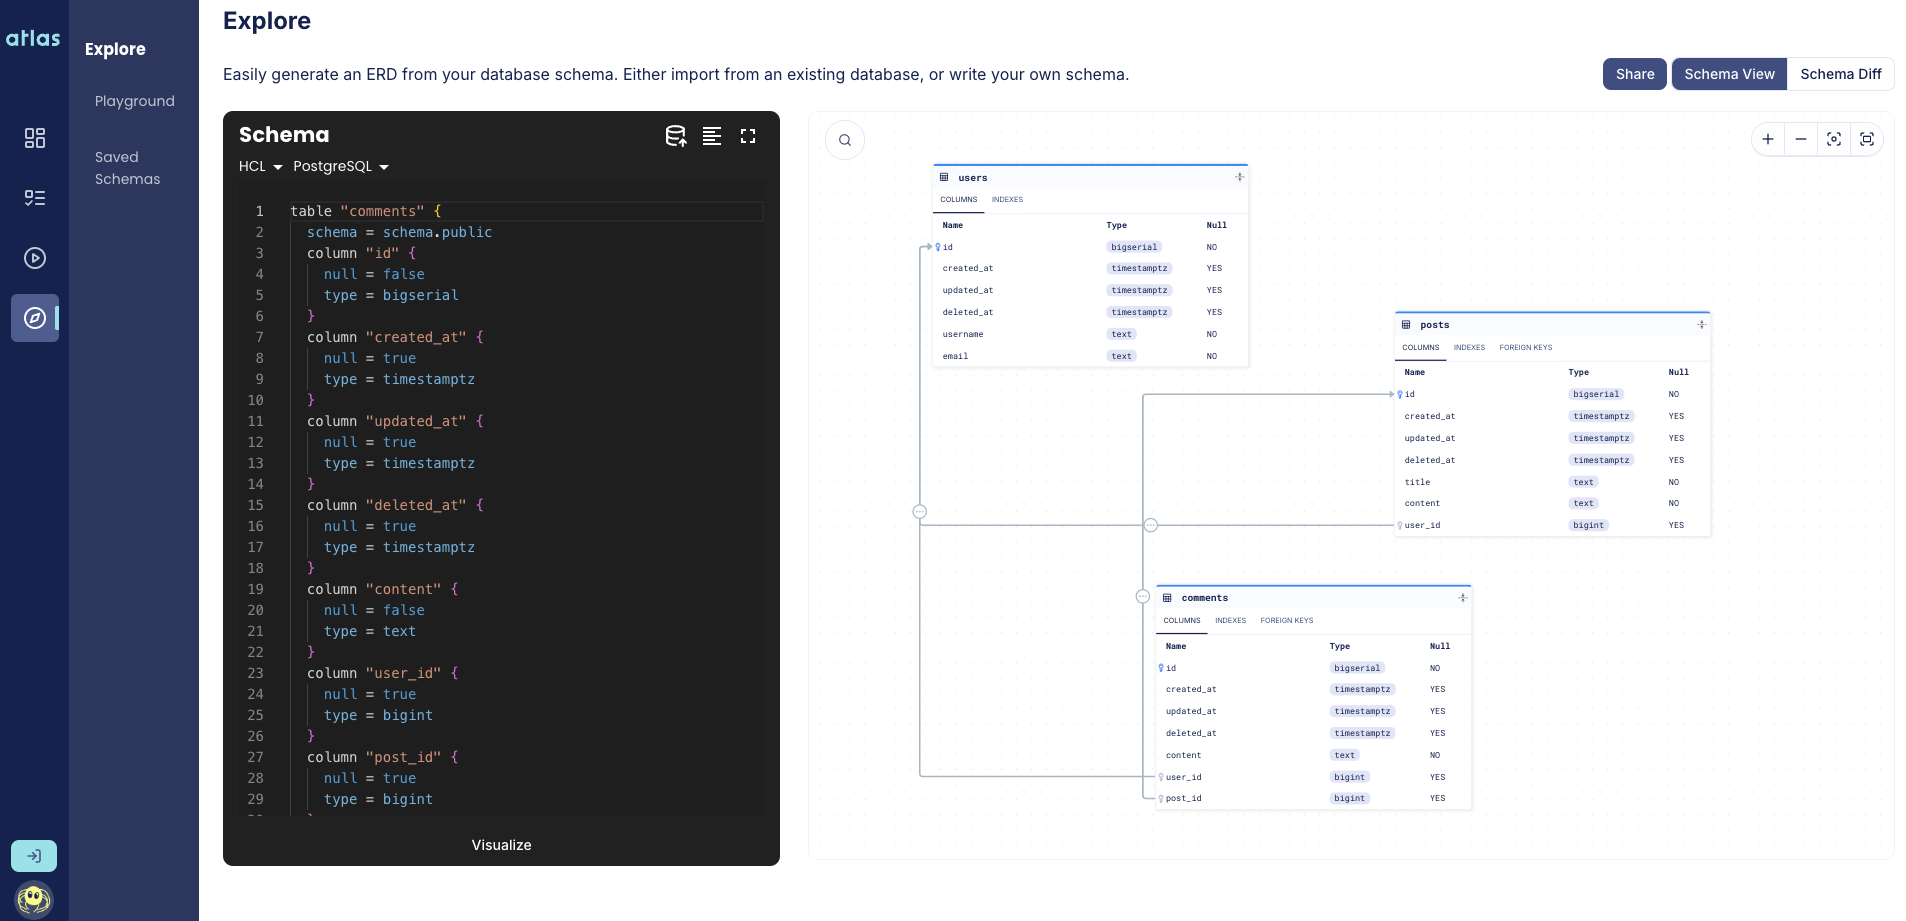
Amazing! Now you can easily view and share your schema. Logged in users can also privately create schemas and save them for future use.