Visualizing Sequelize Schemas
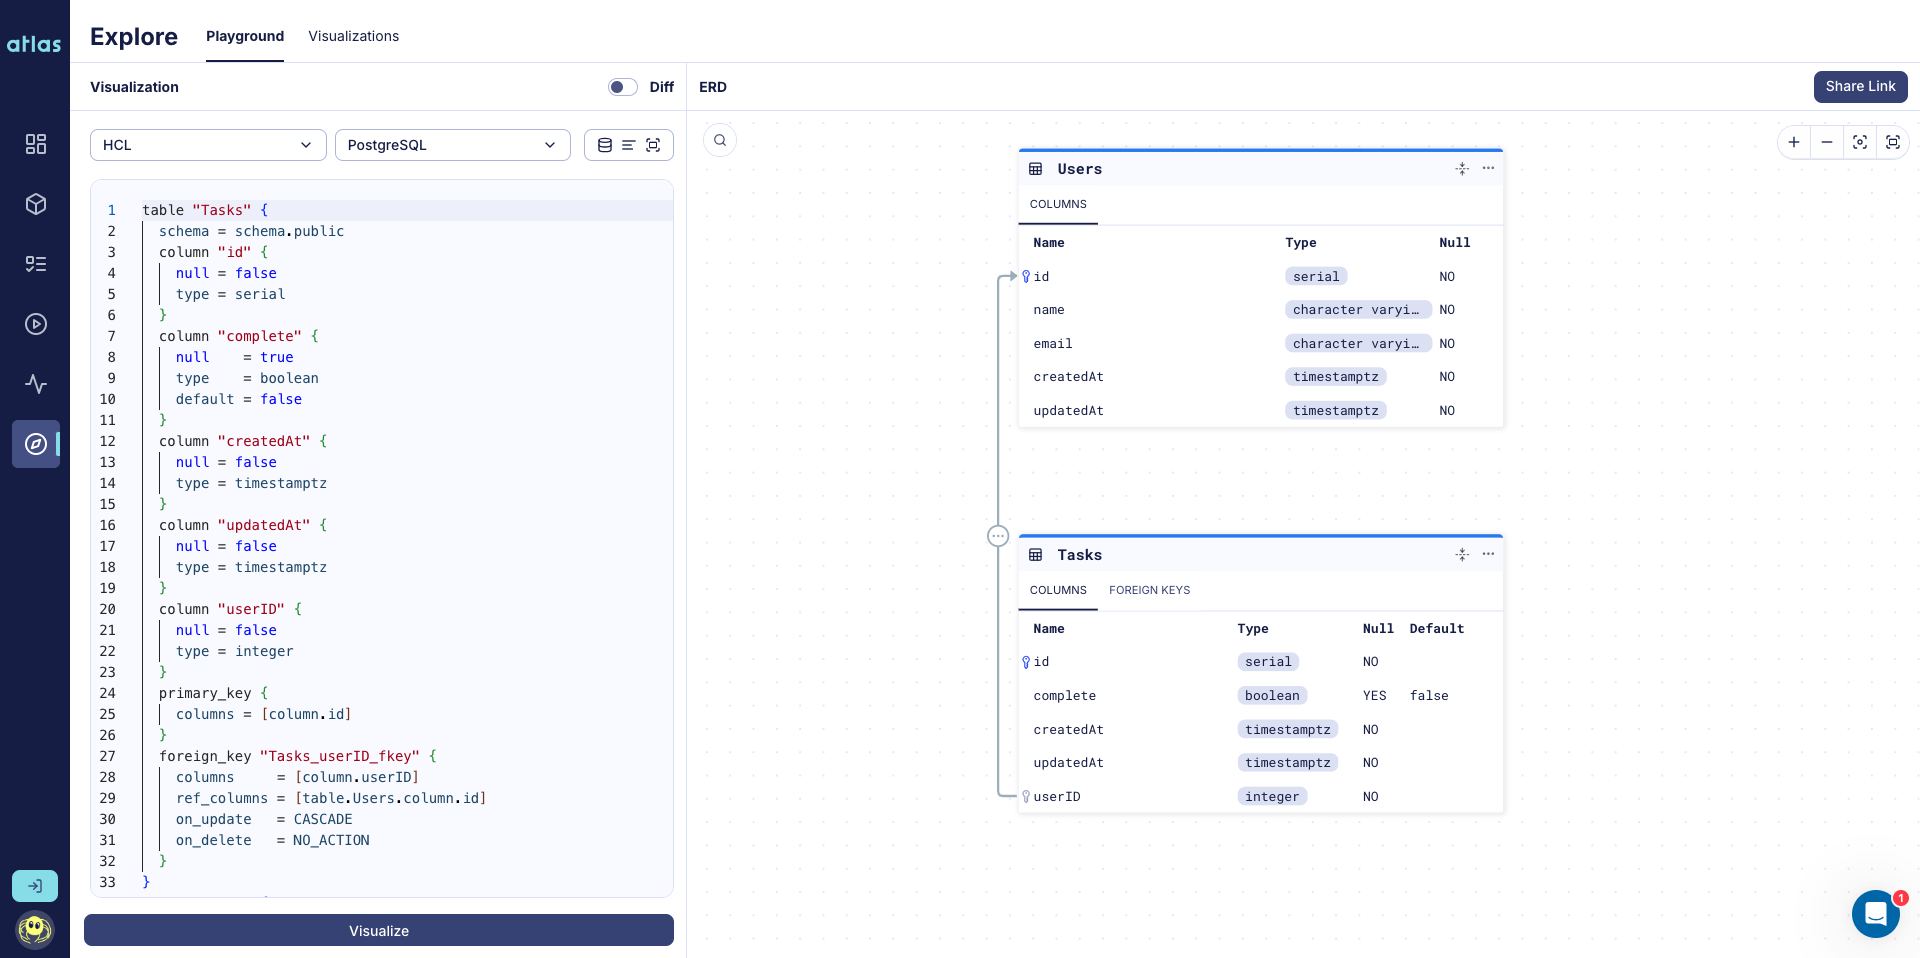
Using an Entity-Relationship Diagram (ERD) tool to visualize a database schema offers a clear and intuitive depiction of the database's structure, simplifying the process of understanding the relationships and dependencies among various entities.
With Atlas, you can easily visualize your Sequelize schema.
Getting started with Atlas and Sequelize
Before we continue, ensure you have installed the Atlas Sequelize Provider on your Sequelize project.
To set up, follow along the getting started guide for Sequelize and Atlas.
Project Setup
Suppose we have the following Sequelize models directory, with two models user and task:
- JavaScript
- TypeScript
- task.js
- user.js
'use strict';
module.exports = (sequelize, DataTypes) => {
  const Task = sequelize.define('Task', {
    complete: {
      type: DataTypes.BOOLEAN,
      defaultValue: false,
    }
  });

  Task.associate = (models) => {
    Task.belongsTo(models.User, {
      foreignKey: {
        name: 'userID',
        allowNull: false
      },
      as: 'tasks'
    });
  };

  return Task;
};
'use strict';
module.exports = function(sequelize, DataTypes) {
  const User = sequelize.define('User', {
    name: {
      type: DataTypes.STRING,
      allowNull: false
    },
    email: {
      type: DataTypes.STRING,
      allowNull: false,
      validate: {
        isEmail: true
      },
    }
  });

  User.associate = (models) => {
    User.hasMany(models.Task, {
      foreignKey: {
        name: 'userID',
        allowNull: false
      },
      as: 'tasks'
    });
  };

  return User;
};
- task.ts
- user.ts
import { Table, Column, Model, PrimaryKey, ForeignKey, BelongsTo, AutoIncrement, DataType, AllowNull, Default } from "sequelize-typescript";

import User from "./user";

@Table({ tableName: "Tasks" })
class Task extends Model {
  @PrimaryKey
  @AutoIncrement
  @Column(DataType.INTEGER)
  id!: number;

 @Default(false)
 @Column(DataType.BOOLEAN)
 complete!: boolean;

  @AllowNull(false)
  @ForeignKey(() => User)
  @Column(DataType.INTEGER)
  userID!: number;

  @BelongsTo(() => User)
  user!: User;
}

export default Task;
import { Table, Column, Model, PrimaryKey, AutoIncrement, DataType, AllowNull, HasMany} from "sequelize-typescript";
import Task from "./task";

@Table({ tableName: "Users" })
class User extends Model {
  @PrimaryKey
  @AutoIncrement
  @Column(DataType.INTEGER)
  id!: number;

  @AllowNull(false)
  @Column
  name!: string;

  @AllowNull(false)
  @Column
  email!: string;

  @HasMany(() => Task)
  task!: Task[];
}

export default User;
Above we see 2 models: User and Task, with a one-to-many relationship between them.
Config File
Before we begin testing, create a config file named
atlas.hcl.
In this file we will create an environment, specify the source of our schema, and a URL for our dev database.
Be sure to update the --path in the config file with the correct path, as well as --dialect and dev
depending on which database you are using.
data "external_schema" "sequelize" {
    program = [
        "npx",
        "@ariga/atlas-provider-sequelize",
        "load",
        "--path", "./path/to/models",
        "--dialect", "postgres", // mysql | mariadb | sqlite | mssql
    ]
}

env "sequelize" {
  src = data.external_schema.sequelize.url
  dev = "docker://postgres/16/dev?search_path=public"
}
Visualizing
Now that we are all setup, we can visualize our Sequelize models by running the inspect command
with the -w flag:
atlas schema inspect --env sequelize --url env://src -w
If you are not logged in, the output should be similar to:
? Where would you like to share your schema visualization?:
  ▸ Publicly (gh.atlasgo.cloud)
  Your personal workspace (requires 'atlas login')
Our browser should open:
Amazing! Now you can easily view and share your schema. Logged in users can also privately create schemas and save them for future use.
