One post tagged with "migrate rebase"

View All Tags

How do I resolve out-of-order migration conflicts after a hotfix?

When working with multiple branches and applying hotfixes directly to production, out-of-order migration conflicts may occur if migration files are created with timestamps that don't reflect the actual merge order.

The Problem

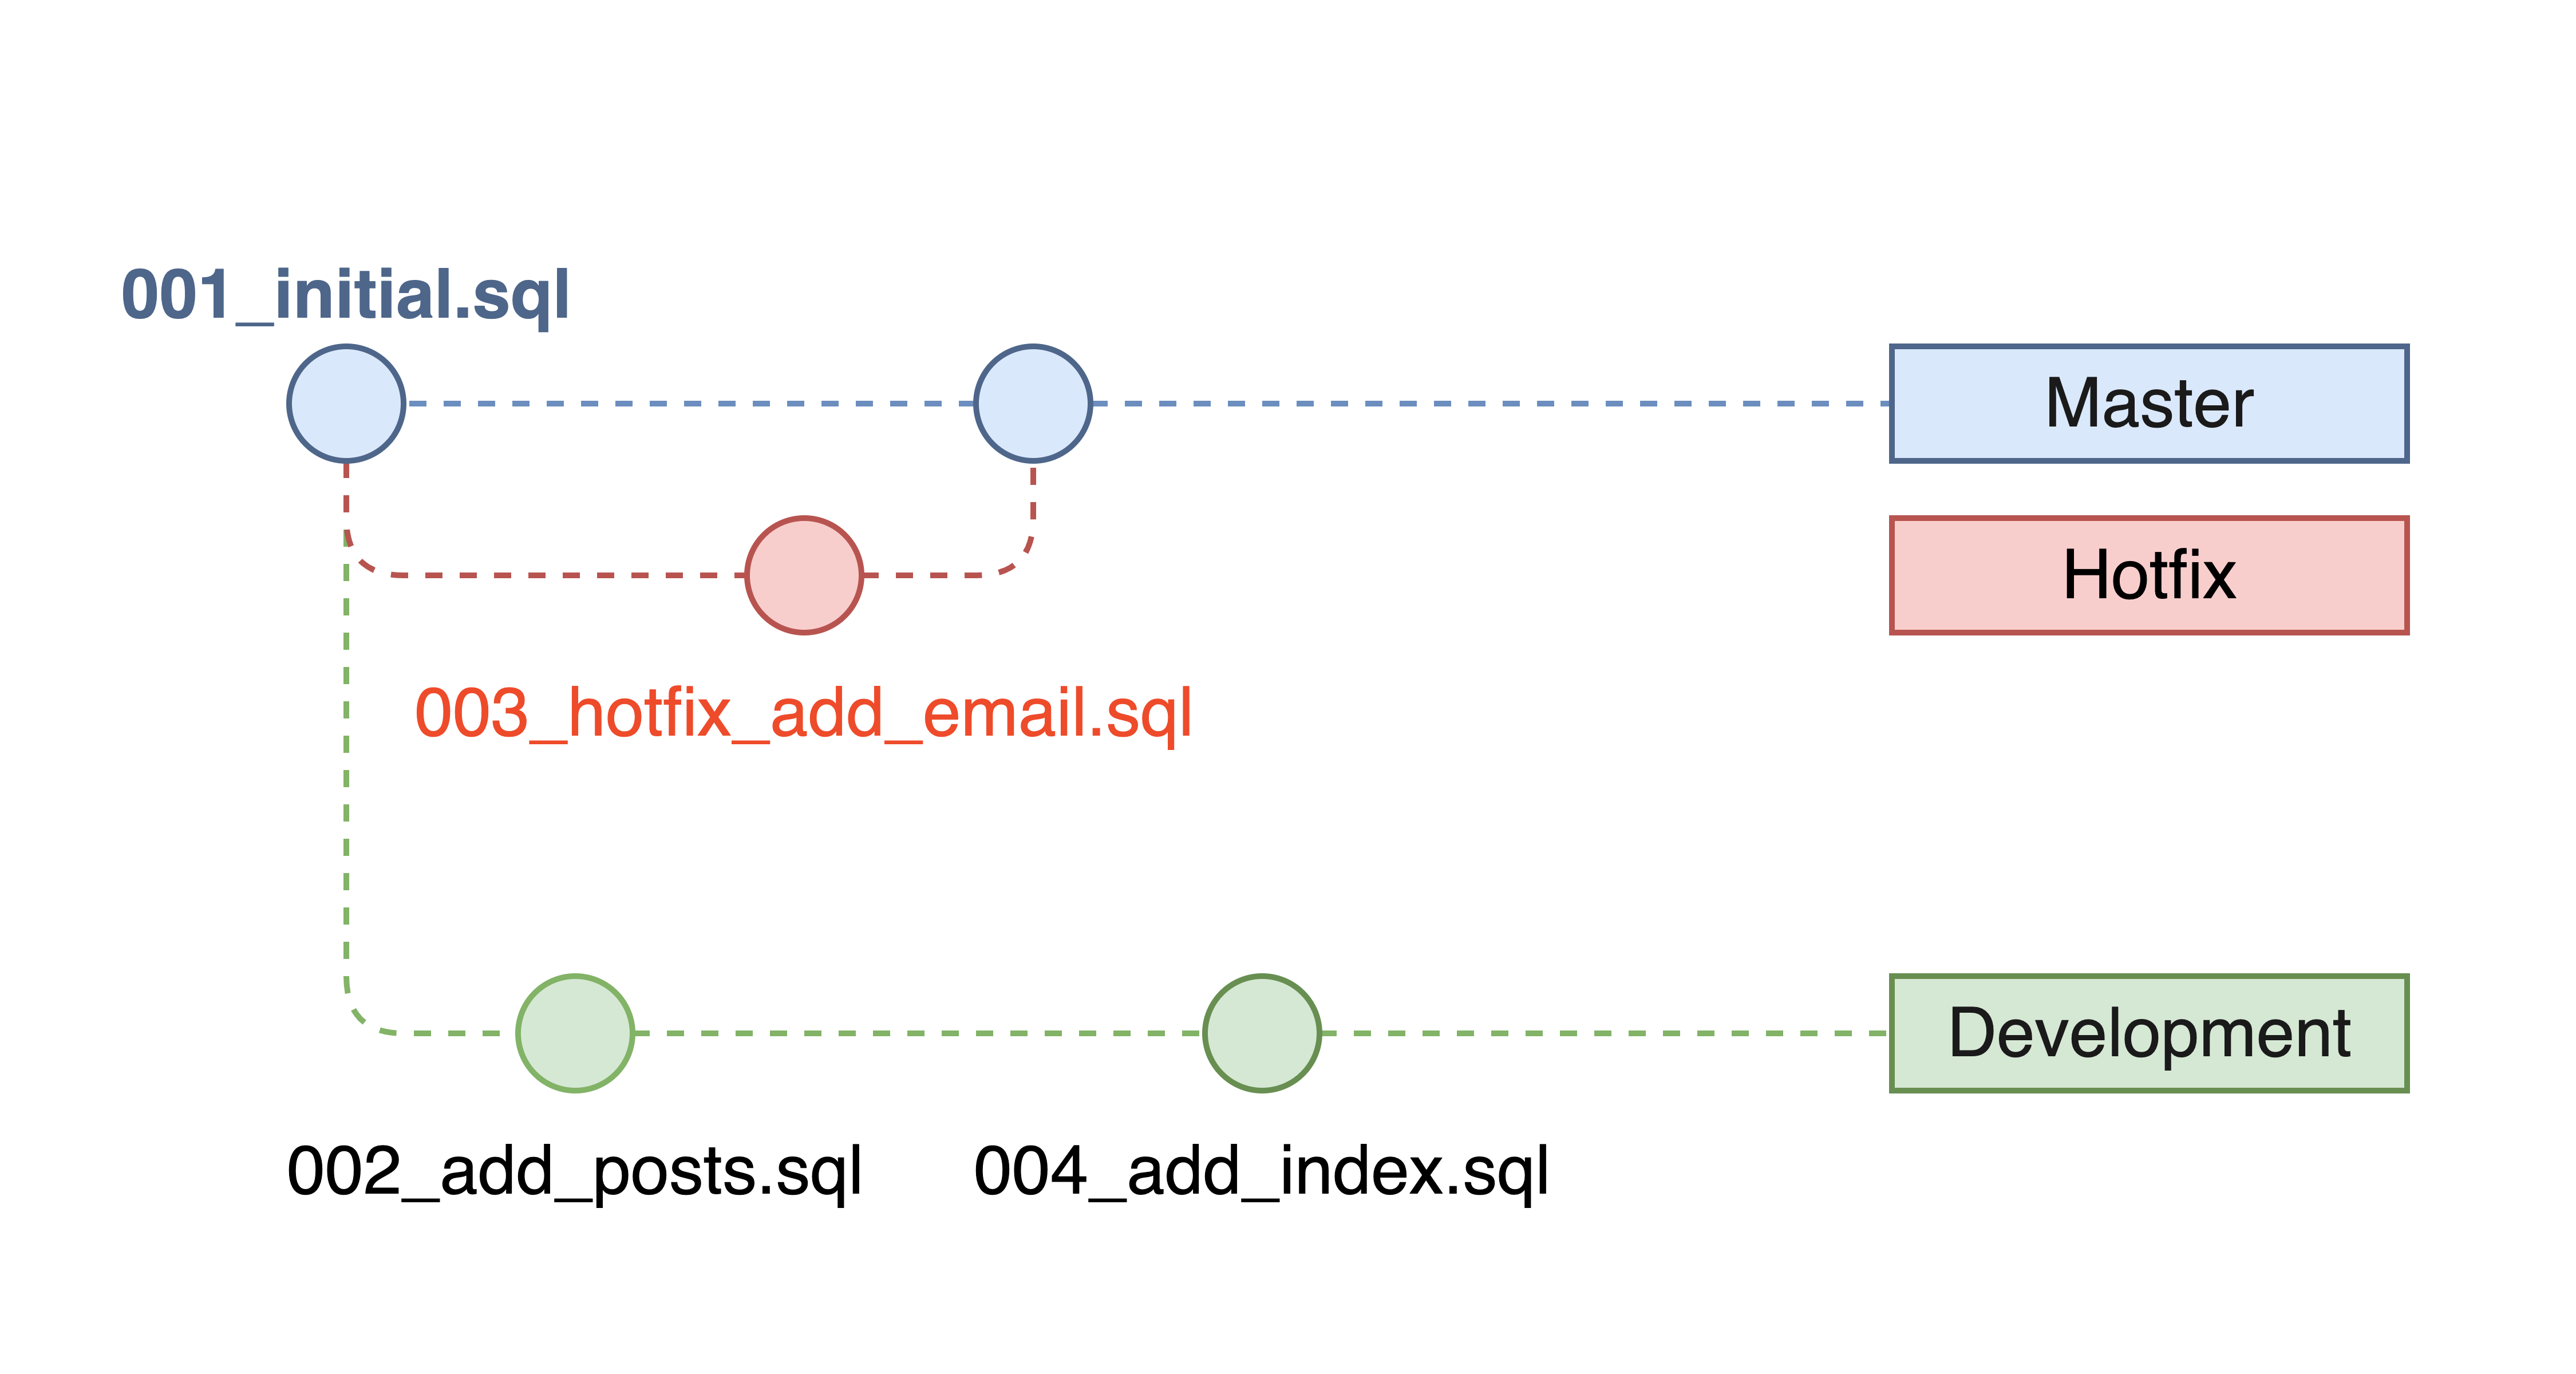
Consider this scenario:

Initial state:

  • Master branch:
    • 001_initial.sql
  • Dev branch (PR pending):
    • 001_initial.sql
    • 002_add_posts.sql
    • 004_add_index.sql

After hotfix applied directly to production:

  • Master branch:
    • 001_initial.sql
    • 003_hotfix_add_email.sql ← hotfix added
  • Dev branch (unchanged):
    • 001_initial.sql
    • 002_add_posts.sql
    • 004_add_index.sql

out-of-order migrations

After merging master into dev - the problem:

  • 001_initial.sql - Applied to production
  • 002_add_posts.sql - Dev-only, not applied to production
  • 003_hotfix_add_email.sql - Applied to production
  • 004_add_index.sql - Dev-only, not applied to production

This creates a non-linear migration history where migration files 002 and 004 were created before and after the hotfix timestamp but haven't been applied to production.

The Solution

Step 1: Get latest changes

Incorporate the latest changes from master into your dev branch:

git checkout dev
git merge master # or git rebase master

This will create a conflict in the atlas.sum file, which is expected. Resolve the git conflicts as usual, choosing any version number for atlas.sum.

The version number doesn't matter because you will then re-hash the migration directory by running:

atlas migrate hash

Step 2: Fix your development database

Since the hotfix was applied to production but not to your dev database, you must bring your dev database to a consistent state before rebasing migrations.

# Apply only the missing hotfix migration
atlas migrate apply --url "mysql://root:pass@localhost:3306/development" \
--exec-order non-linear

The --exec-order non-linear flag in Atlas lets you run migration files even if they weren’t created in order. This is handy when multiple developers add migrations at the same time and version numbers don’t line up. Learn more about execution order options.

Step 3: Rebase migrations

With your dev database in a consistent state, run atlas migrate rebase <versions> to shift pending migrations to come after the hotfix. Rebase only the files that haven't been applied to production:

# Rebase the dev-only migrations
atlas migrate rebase 002 004

This command will:

  • Rename the out-of-order migration files with new timestamps that come after the hotfix
  • Update the atlas.sum file with the new checksums

Step 4: Verify the rebase

After rebasing, your migration directory should look like:

migrations/
├── 001_initial.sql
├── 003_hotfix_add_email.sql # hotfix from master
├── 005_add_posts.sql # rebased (was 002_add_posts.sql)
├── 006_add_index.sql # rebased (was 004_add_index.sql)
└── atlas.sum

Since your development database already has the schema changes from the rebased migrations applied, mark them as applied to avoid re-execution:

atlas migrate set 006 --url "mysql://root:pass@localhost:3306/development"
Side Effect

Using atlas migrate set will update the atlas_schema_revisions table to mark migrations as applied without actually executing them. This can cause inconsistencies in the revision history.

Step 5: Deploy the changes

Update the PR and deploy the changes:

  • With CI/CD setup: Wait for Atlas CI to pass, then merge the changes. The rebased migrations will be applied automatically during deployment.
  • Without CI/CD setup: Manually apply the rebased migrations to your production database after merging:
atlas migrate apply --url "mysql://root:pass@aws-rds:3306/production"
Simpler Alternative for Local Development

Working with a local development database? Here's a shortcut that can save you some steps! Instead of the careful sync process in Steps 2 and 4, you can just reset your database after rebasing.

Skip Steps 2 and 4 entirely. Just do Step 3: Rebase migrations first, then:

# Clean the dev database and reapply all rebased migrations
atlas schema clean --url "mysql://root:pass@localhost:3306/local"
atlas migrate apply --url "mysql://root:pass@localhost:3306/local"

This method keeps your migration history of the local development database consistent with the production database.

Further Reading